
Financial Companion User Guide
Welcome to the Financial Companion App! This documentation provides step-by-step instructions to help you master your finances, configure budgets, track assets and liabilities, and optimize debt payoff strategies.
Getting Started
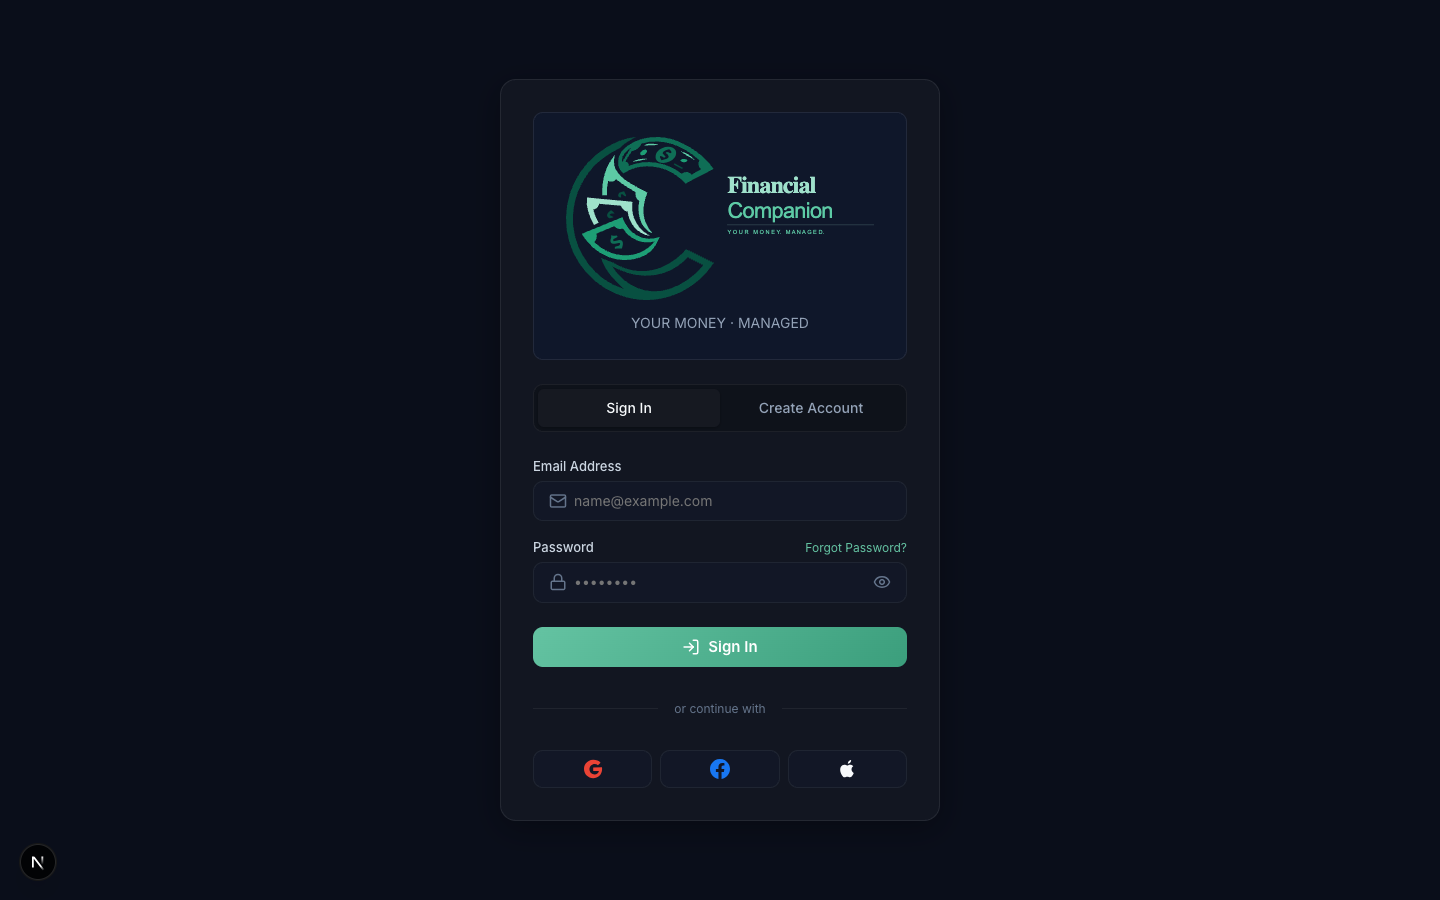
Before exploring your dashboard, you will need to sign in or create an account. The application supports credentials-based login and Google authentication.
Accessing Your Account
- Registering: Sign-up is by invitation. Open the invitation email, then on the "Create Account" tab enter your name, the same email address the invitation went to, and a password, and click "Register". Passwords need at least 8 characters, with an uppercase letter, a lowercase letter, a number and a special character. Without an invitation you’ll see “Registration is by invitation only”. Ask the account owner for a partner invite, or an administrator for an account of your own.
- Logging In: Navigate to the "Sign In" tab, enter your registered credentials, and click "Sign In". If Multi-Factor Authentication (MFA) is enabled on your profile, you will be prompted for a 6-digit code from your authenticator app. Each code works once.
- Google OAuth: Alternatively, click the Google button at the bottom of the card. A Google account whose email has an invitation can register this way too. If you’re already signed in, sign out first: an existing session can’t be used to attach a new Google account.
- How long you stay signed in: you’re signed out after about 20 minutes without activity, and always 24 hours after signing in. Changing your password, email or two-factor setting signs out every other device.
- Locked out? Only wrong passwords count toward the lockout, so someone else typing your email can’t lock you out. After repeated failures, wait 15 minutes or reset your password.
Dashboard
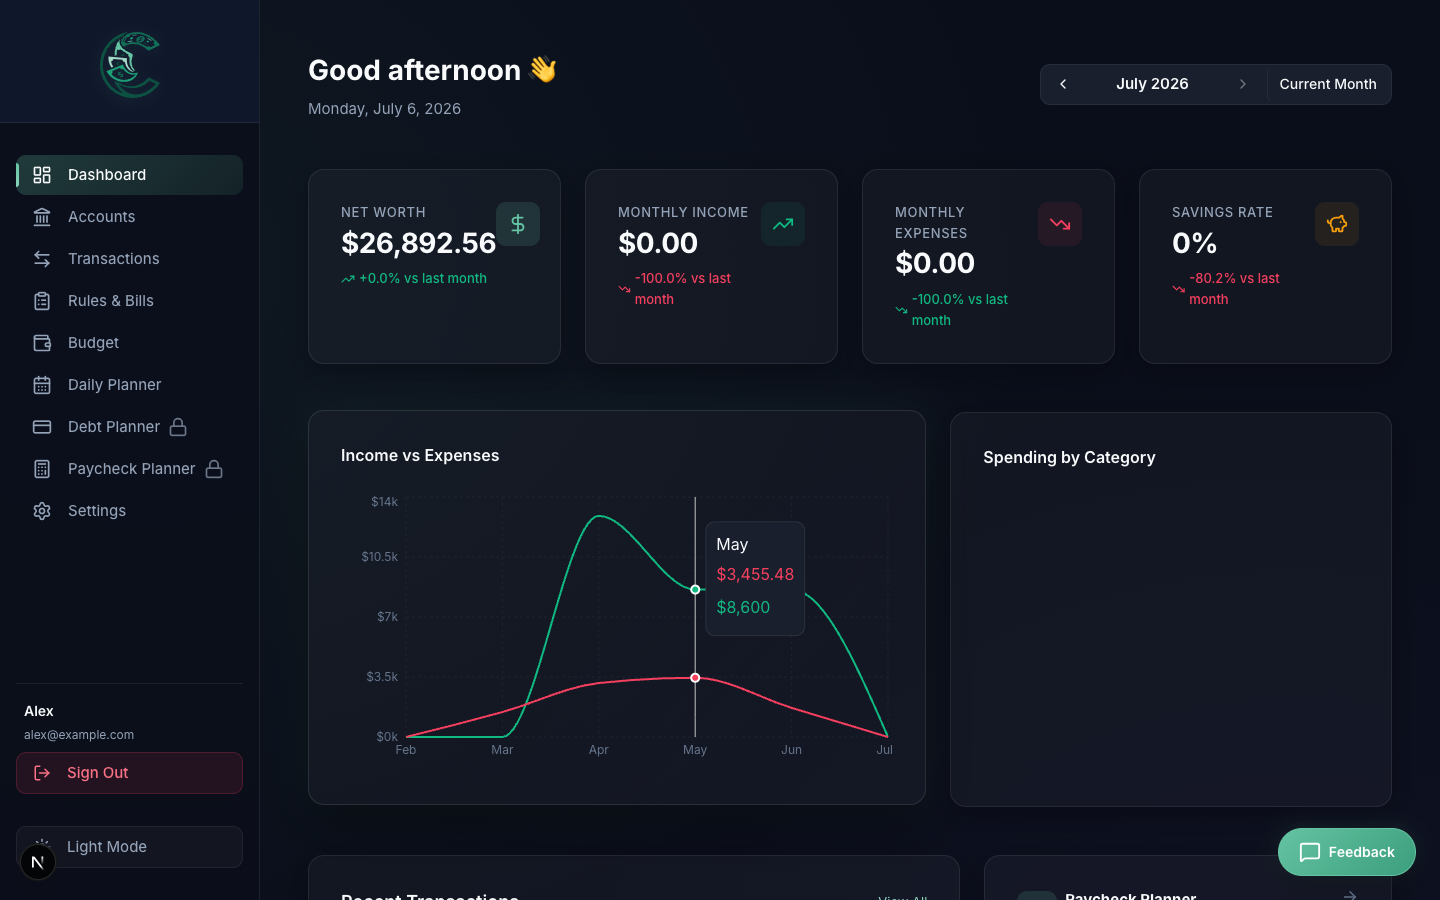
The Dashboard is your financial control room. It provides a high-level view of your current month's performance, assets, liabilities, and spending trends.
Key Features
- Net Worth Tracker: Calculated dynamically as
Assets - (Liabilities + Unlinked Debts). - Cash Flow Card: Aggregates total income against total expenses for the navigated month.
- Historical Trend Line: Displays a 6-month historical net worth and spending trend chart. Changing the active month dynamically updates the chart data window.
- Month Navigation: Use the chevron buttons (
<and>) in the nav controls to move between months. All summaries, progress stats, and list items adjust instantly.
Transactions Management
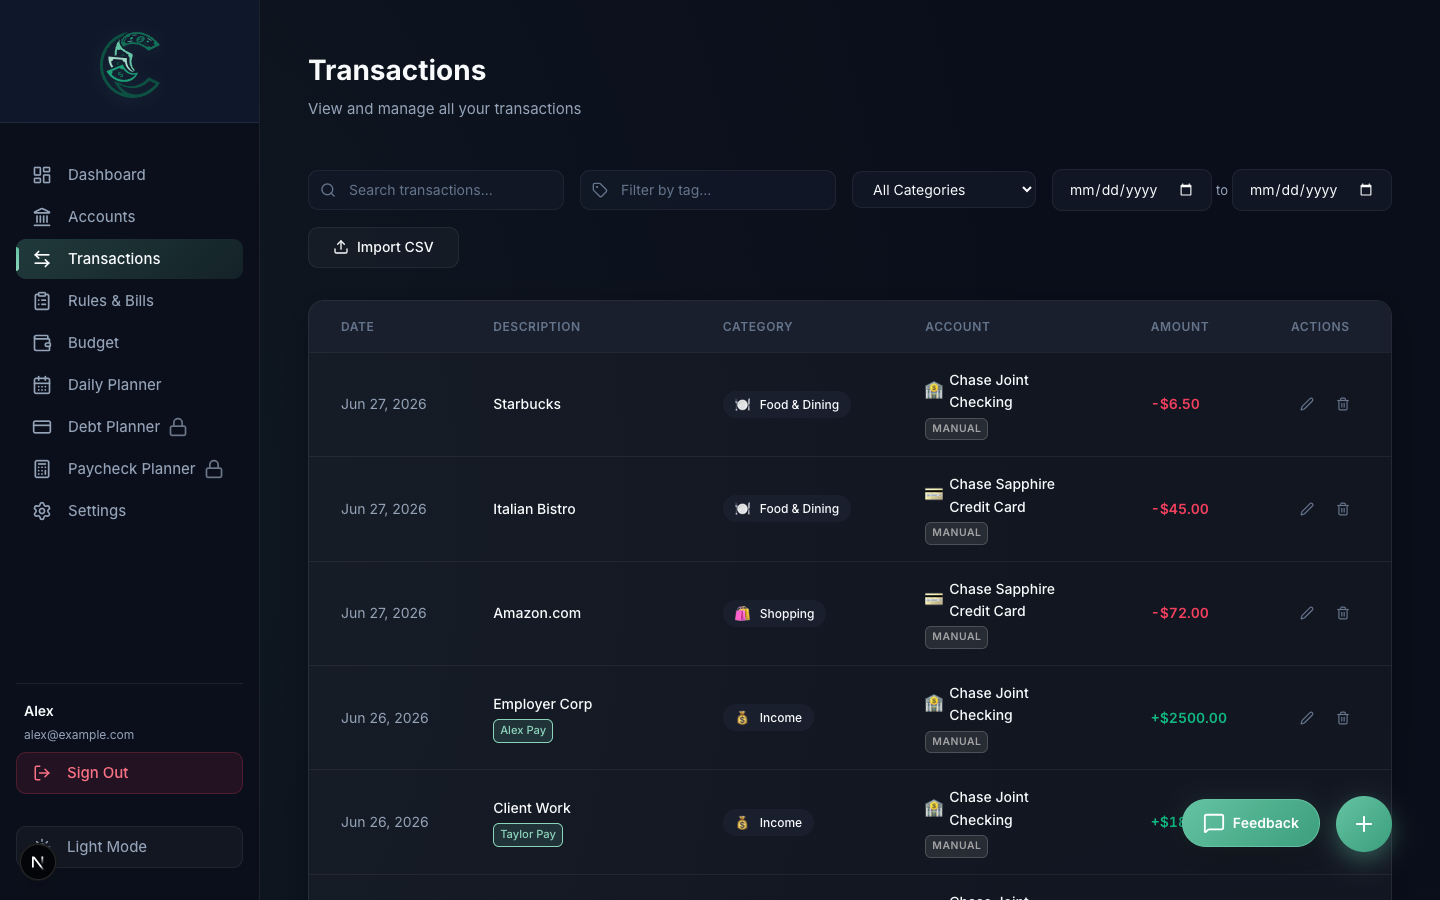
Keep your transactions up-to-date by logging manual transactions, synchronizing with your bank via Plaid, or importing CSV files.
Logging a Transaction
Manual entry is for cash, accounts without a bank feed, or anything a sync missed.
- Click the "New Transaction" button to launch the creation panel.
- Select the transaction type: Income, Expense, or Transfer.
- Enter the amount, select an active financial account, a category, specify tags, and set the transaction date.
- Receipt Uploads: Choose an image or PDF receipt to attach it to the transaction. It will be stored securely on the server and viewable in the details drawer.
- Click "Save". The associated account's balance updates automatically.
Tip: Paired Transfers
When you log a Transfer, the system automatically creates a paired transaction in the linked destination account. Changes or deletion of either side will automatically trigger a synchronized rollback and update to both account balances.
CSV Imports, Plaid, & SimpleFIN Sync
- CSV Importer: Click "Import CSV". Choose your file, select which account it maps to, map your headers, and import transactions in bulk. The account balance is updated in a single atomic database operation.
- Bank Synchronization: Click the Sync Banks button on the Transactions page toolbar to fetch the latest transactions and real-time ledger balances from all active Plaid and SimpleFIN bank connections simultaneously.
- Plaid Synchronization: Connect your bank accounts via Plaid under Settings -> Import & Export to enable automatic sync capabilities.
- SimpleFIN Synchronization: Link your accounts securely using SimpleFIN Bridge. In settings, input a Setup Token generated from your SimpleFIN dashboard. The application will synchronize transactions automatically or on manual sync commands.
Credit Card Payments & Refunds
Bank-synced feeds don't tell the app which transactions are payments or returns — they just show money moving. Every sync scans for these two patterns and reclassifies them automatically so they don't inflate your income.
- Credit Card Payments: When you pay a card bill outside the app (e.g. through your bank's own bill-pay), the sync sees two unrelated rows: a debit on the funding account and a credit on the card. The app looks for a payment-shaped description (
PAYMENT,AUTOPAY,THANK YOU, etc.) on the card side and a matching debit within a few days, then links them as a Transfer — the same way a transfer you create manually works. A linked pair shows a blue Transfer badge and is excluded from income and expense totals. - Refunds & Returns: A merchant credit (a return, a reversed charge, a chargeback) is recognized by its description or by Plaid's spending category, and is stored as an Expense with a positive amount rather than as income. It nets against the original purchase instead of counting as new income — a $200 purchase followed by a $75 return reads as $125 spent, not $200 spent plus $75 earned. It also credits back into the category and budget you assigned to the purchase.
- Retirement & Brokerage Activity: Shown with a blue Transfer badge rather than as a red expense. Anything that happens inside an account set to Investment — a 401k contribution, a dividend paid into the account, a fund purchase — is portfolio movement, not household cash flow, and never reaches your spending or income totals. This matters most for payroll contributions: your paycheck deposit is reported by the bank after the 401k deduction has been taken out, so counting the contribution as well would charge you for money that never passed through your checking account. Money that genuinely leaves the account, such as a withdrawal into checking, arrives on the checking side and counts normally.
Set the Account Type, Not the Category
Retirement and brokerage exclusion works off an account's type, not its name or its transactions' categories. The app automatically detects investment platforms (like Vanguard, Fidelity, Schwab, Empower, etc.) and accounts with holdings. If an account was previously set up as Checking, simply open Accounts and change its type to Investment. The system immediately corrects all spending totals and automatically updates all of the account's existing transactions to blue transfers — you never need to edit or recategorize the individual transactions.
Tip: When the App Can't Tell
If two payments of the same amount post within a day or two of each other, the app can't safely guess which funding transaction belongs to which card payment — it leaves both unlinked rather than risk pairing them wrong. You can pair them yourself: choose Transfer in the New Transaction form and pick the two accounts. If the app ever links the wrong pair, open either transaction and choose Not a transfer — this separates the two rows without deleting them or touching your account balances, and the app will remember not to re-link that pair on the next sync.
Refund detection relies on the description your bank supplies and the category it reports, so an unusually-worded credit may not be recognized and will still appear as income. Worth a quick review of anything coloured after your first few syncs.
Fixing a synced credit the detector missed: Open the transaction and choose Mark as refund. This works even on bank-synced rows (where you otherwise can't change the type), and only flips how it's counted — the amount, date and your account balance don't change. Give it the same category as the original charge and it nets to zero in that budget. If a credit arrives every month with the same description (e.g. a "Walmart+ Credit" that offsets the subscription), set up a Transaction Rule instead (Settings → Transaction Rules) so it's converted automatically on every future sync.
Recording a refund by hand: When you log a transaction yourself — a cash return, or a reimbursement a friend sent you for a shared expense — select Expense and tick "This is a refund or return". Give it the same category as the original purchase. The app records it as a positive-amount expense so it credits that category and budget back instead of counting as income.
Never Categorize a Return as "Transfer"
The Transfer category is reserved for money moving between your own accounts, and is excluded from both income and expenses. Tagging a refund as Transfer removes it from income (correct) but leaves the original purchase standing at full price in your expenses (incorrect) — your spending total would end up higher than what actually happened, not lower. Always leave a refund's category as whatever the original purchase was (e.g. a returned Amazon order stays tagged Shopping).
Bulk Transaction Actions
You can manage multiple transactions simultaneously using the bulk actions toolbar:
- Selecting Rows: Use the checkboxes on the left side of each transaction row, or click the select-all checkbox in the table header to select all visible transactions on the page.
- Batch Updates: With rows selected, use the toolbar to delete them, assign them to a rental property and Schedule E category, set a budget category, or add/remove tags.
- Protection of Bank-Synced Rows: Synced transactions (from Plaid or SimpleFIN) are automatically protected and skipped during bulk deletion. The summary will report exactly how many rows were updated, and how many were skipped for protection.
Searching & Filtering Transactions
The toolbar provides both a quick smart search bar and an expandable Filters drawer to narrow down your transaction feed:
- Entry Source Filtering: Use the Source filter in the Filters drawer to view Manual Only transactions (created by hand or through receipts) versus Synced Only transactions (imported via Plaid or SimpleFIN bank feeds).
- Unassigned Accounts ("No Account"): Select No Account in the Account dropdown filter to instantly locate transactions that do not have an assigned financial account, making reconciliation and cleanup simple.
- Category & Property Filters: Filter by specific parent/child budget categories (or Unassigned) and filter personal vs. rental property activity.
- Date Periods & Time Controls: Switch between All Time, Month, Week, and custom date ranges with interactive prev/next stepper controls.
- Refunds Only: Toggle the Refunds only switch to isolate reversed merchant charges and customer credits.
Search Formulas & Syntax
The search bar supports smart parsing to locate specific entries by text or numeric values. You can search across descriptions, notes, tags, category names, or filter directly by transaction amount.
| Search Type | Example Input | Description |
|---|---|---|
| Text | Target |
Matches descriptions, notes, tags, or category names containing "Target". |
| Exact Amount | $45.50 or 45.50 |
Finds transactions with an amount of exactly 45.50 (both income and expenses). |
| Range Search | 25..40 or 25 to 40 |
Finds transactions with amounts between $25.00 and $40.00. |
| Greater Than | > 100 |
Finds transactions where the absolute amount is greater than 100. |
| Greater Than or Equal | >= 50 |
Finds transactions where the absolute amount is 50 or more. |
| Less Than | < 20 |
Finds transactions where the absolute amount is less than 20. |
| Less Than or Equal | <= 10 |
Finds transactions where the absolute amount is 10 or less. |
Reports & Spending Search
Reports has two tabs. Overview totals your expenses, income or net flow for a date range, with the running trend and every transaction in it. Spending Search answers questions like “how much did we spend at Starbucks this year?”: you describe what to look for, choose a period, and get the total, a chart, the matching transactions and downloads.
Building a Search
- Description matches any of: type a merchant and press Enter to add it as a chip. Any chip can match (OR). Typing
Whole Foods OR WFM, or a rule-style list such asUber|Lyft, adds each one as its own chip. Put a name that contains “or” in quotes to keep it whole:"Trick or Treat". - Matching is forgiving: capitals, spaces and punctuation are ignored, so
Whole Foodsalso findsWHOLEFOODS MKTandWHOLE-FOODS.COM. Each term matches from the start of a word, soStarbfinds Starbucks butAT&Tdoesn’t matchSEATTLE. A second chip that would match exactly the same rows, such asWholefoods, isn’t added, and the box tells you why. Banks also abbreviate (WHOLEFDS), so add those spellings as extra chips. - Leave out descriptions containing: anything matching one of these chips is excluded (NOT), for example
Gift Card. - Filters must all match as well (AND): category (a parent category includes its subcategories), account, a minimum or maximum amount, and Spent or Received.
- Period: this or last week, month, quarter or year, year to date, the last 12 months, all time, or custom dates. Weeks start on Monday, and dates follow the Transactions page. Chart picks the bars: by day, week, month, quarter or year (Automatic chooses from the length of the period).
Reading the Results
- Totals: total spent (refunds are subtracted from it, as everywhere else in the app), the change against the same stretch of the previous period, the number of purchases, the average purchase, the largest one, and the average per week, month or year. A period still in progress also shows where it is on pace to finish.
- Chart: one bar per period, with the previous period beside it in gray. Select a bar (or use Table for the same numbers as a table) to list only that period’s transactions. A saved report’s spending limit is drawn as a line when the bars match its period.
- Matched descriptions: every variation of the description the search caught, with its count and total. Store numbers and dates are grouped, so
STARBUCKS STORE 01234andSTARBUCKS STORE 05678are one line. Untick a line to leave it out. This is the quickest way to check that the total is what you meant. - By account and By category show where the money went, and Transactions lists every match.
- Downloads: CSV (every matched transaction, with the bank’s amount next to what the report counted), Excel (summary, totals by period, descriptions and transactions on separate sheets) and PDF (a printable report with the chart and tables).
From the Transactions page, the chart button in the search box opens the same search in Reports.
Top Merchants, Subscriptions & Rules
- Top merchants: before you type anything, Spending Search lists the period’s ten biggest merchants. Select one to search it. The names are worked out from bank descriptions (prefixes like
SQ *, store numbers and the city are dropped), so the search may find a little more than the list showed. - Repeating charges: when a search’s charges over the last 400 days arrive on a schedule (weekly, every two weeks, monthly, quarterly or yearly), the results say so: about how much, when it’s next due, and whether the price changed (“the latest charge was $17.99, up from $15.49”). Track as bill opens Rules & Bills with a bill filled in for you to check and save. It isn’t offered when a bill already tracks the charge. Bills can repeat weekly, every two weeks, monthly, quarterly or yearly.
- Create rule: opens Rules & Bills with an automation rule that matches the same descriptions as the search, including its leave-out terms and any descriptions you unticked. Pick what the rule should do (a category, tags or a budget) and save. Rules can’t filter by category or by more than one account; when the search uses those, the form says what was left off.
Saved Reports, Emails & Alerts
Choose Save as report to keep a search. Saved reports belong to the household: partners see the same list, and the period stays relative (“year to date” is always this year). Open one and choose Emails & alerts to set:
- Scheduled summary: weekly, monthly, quarterly or yearly. It covers the period that just ended and arrives a day after it closes, so charges that post late are included: Tuesday morning for a week, the 2nd for a month, quarter or year. It shows the total, the change from the period before, a trend of recent periods and the top descriptions, by email, Discord or both. The email can attach the period’s transactions as CSV.
- Spending limit: an amount per week, month, quarter or year. You get one alert per period as soon as the total reaches it. Changing the limit re-arms it.
- Each new charge: post every new matching charge to Discord, checked hourly after your banks sync. This is Discord only. Charges already in your ledger, and older charges brought in by an import, are not posted.
- Discord channel: by default a report’s Discord posts go where Settings routes saved reports (see Discord Channels for Notifications). Pick a webhook here to give this report a channel of its own.
- Who gets the emails: any household member with an email address. Each person can still turn these emails off for themselves in Settings → Notifications.
Tip: Try It Before You Wait a Month
Email me a test sends the summary for the last complete period to you alone, without touching the schedule. Read-only partners can run, download and test reports but can’t save or change them.
Accounts Tracker
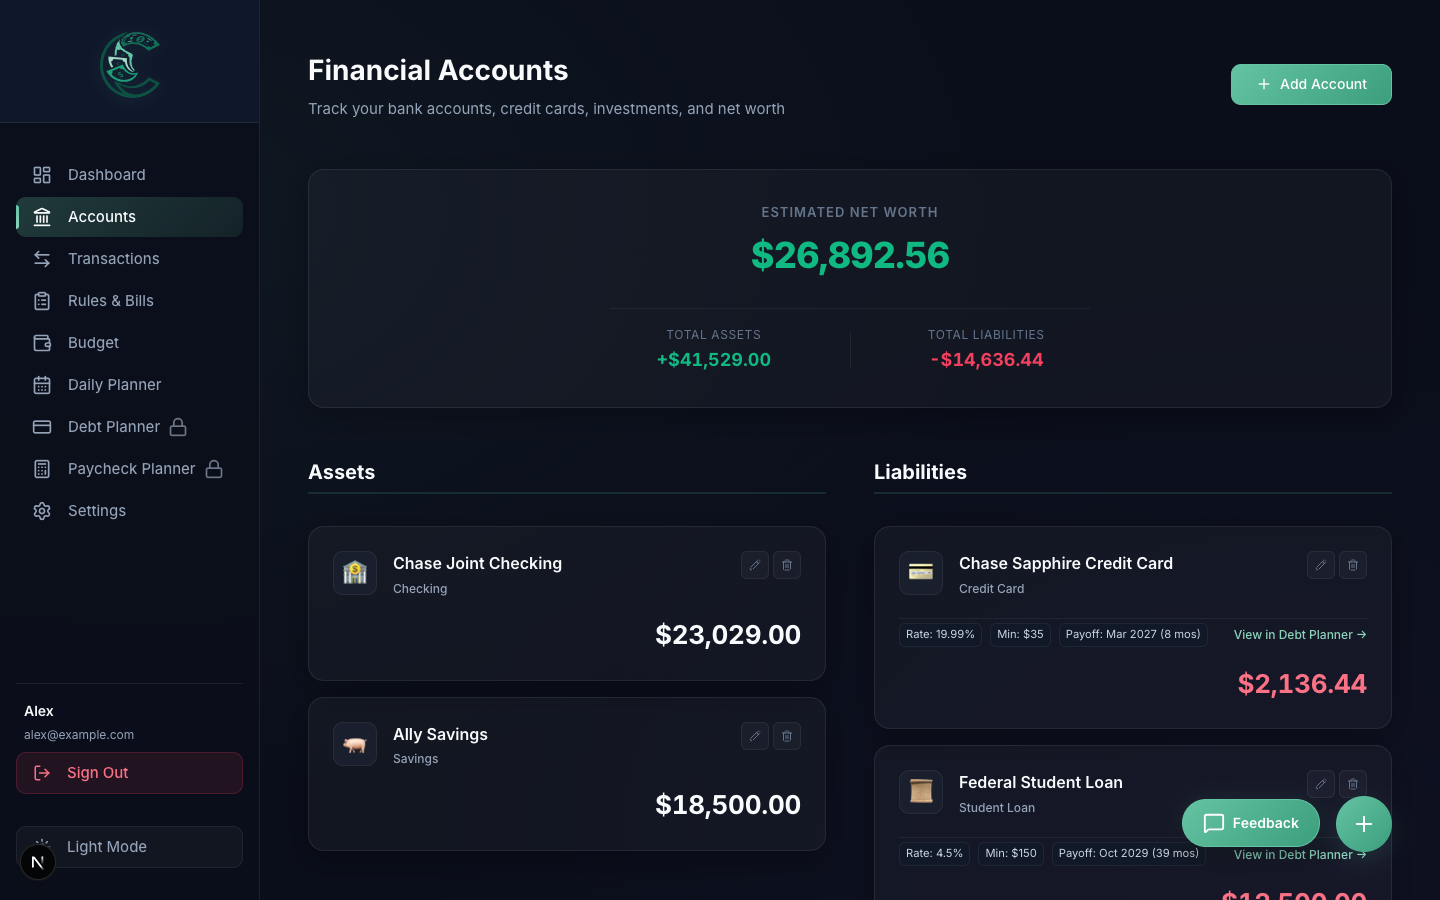
Manage all your asset and liability accounts in one place. Financial accounts support automatic Plaid links as well as manually managed ledgers.
Managing Accounts
- Create Account: Click "Add Account", choose the type (Checking, Savings, Credit Card, Loan), and enter the initial balance.
- Data Source Badges: Every account card displays a visual badge indicating its feed origin:
🔗 Plaidfor Plaid-linked feeds,🌐 SimpleFINfor SimpleFIN-linked feeds, or✋ Manualfor manually managed ledgers. - Syncing and Balance Editing: Accounts linked via Plaid or SimpleFIN retrieve live balances automatically, disabling the manual balance entry input field to prevent accounting desynchronization. Manually maintained accounts automatically recalculate their balances whenever transactions are logged, updated, or deleted.
- Reconcile an Account: When an account’s balance disagrees with your bank statement, click the scale icon on its card (Reconcile Account) and enter the actual bank balance. Add Adjustment Transaction records the difference as a dated “Balance Adjustment” transaction, so the history shows when and by how much the ledger was corrected. Update Starting Balance shifts the account’s starting balance instead, for a gap that dates from before your first transaction. If the ledger already matches, neither method adds anything.
Budgets & Rollovers
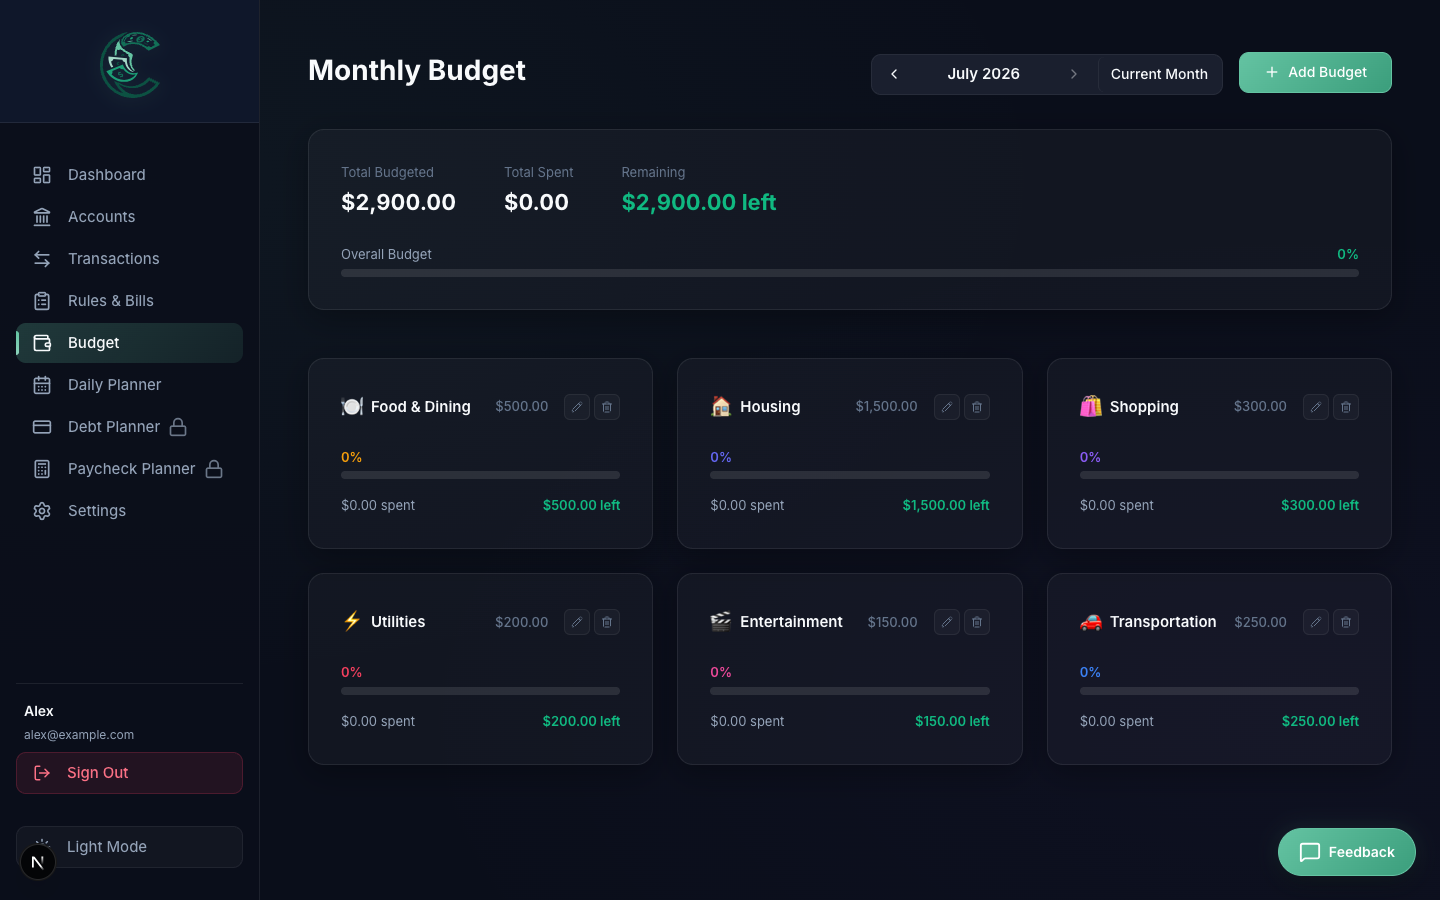
Create category budgets and enforce monthly spending limits. The app tracks progress using progress bars and supports rollovers.
Setting Up a Budget
Category budgets represent your monthly operational spending limits (such as groceries, dining, entertainment, or utilities). For non-monthly or irregular bills (e.g. annual auto insurance, property taxes), use Planned Expenses instead.
- Navigate to the Budgets page and click "Add Budget".
- Choose a category (only unbudgeted categories for the active month are displayed).
- Set the Monthly Budget Amount.
- Rollover Mode: Toggle "Enable Rollover" if you want any leftover funds (or overspent deficits) from the previous month to automatically carry over into the next month.
- Click "Create Budget".
Build a Budget from Spending History
On the Budgets page, choose Plan with AI to generate editable recommendations from 3, 6, or 12 completed prior months. The default is six months with a balanced approach. Choose historical spending to follow observed habits, or reduce flexible spending for stronger cuts. AI guidance uses your configured provider and existing AI access; spending-based recommendations remain available when AI is unavailable.
Each category shows its historical average, current base budget, recommended limit, explanation, and monthly spending. Categories without budgets are included. Balanced plans propose a 10% reduction in clearly flexible categories; the stronger approach proposes 20%. Known recurring bills are kept covered. Limited history, irregular spending, categories with planned expenses, and multiple budgets sharing a category are flagged for review.
Seasonal, lumpy and changed categories. With at least a year of history, a category that swings with the seasons (electricity in summer, heating oil in winter) is budgeted for the month you are planning, from the same month in up to three earlier years, scaled to your current spending level. A pattern seen in only one earlier year is flagged and left unselected. Categories that arrive in a few large charges a year, such as an oil fill or an annual premium, are budgeted at the year’s total divided by twelve, once the category has a year of its own history; a planned expense may suit them better. When the last three months differ from the same months a year earlier by 30% or more (and at least $25 a month), the plan asks whether something changed, such as a move, new equipment or a new provider, and offers Something changed — use recent months. Categories under the same parent get a combined line when their seasons offset each other.
Updating a budget automatically. Tick Update this budget automatically each month on a category and choose the largest monthly change (10%, 25%, 50% or 100%). From the 25th, next month’s budget moves toward the plan built from your historical spending (never the reduce goal’s cuts), by at most that much, as a change to next month only. Your ongoing default is not changed, so each month starts again from it. Categories the plan flags for review, whose spending recently changed, or that have several budgets are left alone, and so is any month whose budget you set yourself. Every change is listed under Recent automatic changes with its reason, and announced by email and in Discord along with your budget alerts.
Edit any suggested amount, select the categories you want, and apply them to the selected month or ongoing monthly defaults. Month-only changes preserve the default. Ongoing defaults also update the selected month while retaining other existing month overrides. Existing rollover settings remain in place. Potential spending reduction is compared with historical spending; lowering an unused budget limit alone does not save money. Check your income and savings goals before applying a plan.
Interactive Drilling
Click on any budget card to expand it and review the detailed list of transactions contributing to that category's spending for the active month (up to 7 scrollable items). Clicking a transaction opens its receipt detail drawer.
Budgets vs. Transfers & Credit Card Payments
Do not create a budget for Transfers or Credit Card Payments. When you make purchases with a credit card (e.g. groceries, dining, shopping), those transactions are already categorized and counted against your budget under their individual categories. Paying off your credit card bill or moving money into savings is an internal transfer between accounts you own, not an expense. Creating a budget for transfers would count that money twice — once when you make the purchase, and again when you pay the bill. Transfers are automatically excluded from monthly spending calculations and from the Budget > Total Spent card. Use the Debt Payoff Planner (/debt) to track card balances, minimum payments, and payoff plans.
Planned Expenses
Regular budgets reset every month, which doesn't fit a bill that only arrives once or twice a year — property tax, an insurance premium, an annual subscription. Planned Expenses, in its own section below your budgets, saves toward those ahead of time instead.
- In the Planned Expenses section, click "New Planned Expense".
- Enter a name, the total amount you'll need, and the date it's due.
- Choose how often it repeats: one-time, quarterly, semi-annual, yearly, or every two years.
- Optionally link it to a category, so its "Reserved" contribution shows alongside that category's spending.
Planned Expenses vs. Monthly Category Budgets: If you are tracking a non-monthly bill (such as annual property taxes or auto insurance) as a Planned Expense, do not set a monthly budget amount for that category in the regular budget table. Keep the category in your system so you can assign transactions to it, but leave the monthly budget at $0.00 / blank. The Planned Expense engine automatically adds the required monthly contribution to your Total Budgeted and Reserved cards. Setting a category budget on top of it would double-budget the monthly set-aside.
Each month, the app works out how much to set aside — the amount remaining divided by the months left before it's due — and adds it to the Reserved total on the Budget page. If you fall behind or add extra one month, next month's amount recalculates automatically; you don't need to adjust anything by hand.
When the bill actually arrives, open the Planned Expense and click "Record Payment," matching it to the transaction from your bank using the interactive, searchable transaction picker. The modal loads all candidate expense transactions for the active month without cutoff, allowing you to search in real time across payees, categories, notes, accounts, tags, dates, and amounts (with automatic support for formatted dollar signs and exact decimals). Candidate cards feature automatic Matching Target badges when amounts line up with your envelope goal. The payment comes out of what you've saved, not out of that category's monthly budget. If you hadn't saved quite enough yet, only the shortfall counts against your budget for the month — the part the fund covered doesn't.
The monthly amount the app calculates is just bookkeeping until you back it with something real. If you actually move money into a separate savings account each month, choose "I put extra money in" and search for the matching bank transfer — the same way a payment links to its bill. The fund is then credited for exactly what the transfer moved. This is optional: skip it and the fund keeps working exactly as before, tracking the target on paper only.
How a Planned Expense shows up everywhere else
Saving ahead only helps if the rest of the app agrees that you did. When a bill is paid from a Planned Expense, that money stops counting as this month's spending — on every screen, not just the Budget page:
- Dashboard — the Expenses card shows what your ordinary month cost, with the fund-paid part named separately underneath (“+$1,800.00 planned draws”). The spending donut gives those slices their own Planned & Sinking Funds group so a once-a-year premium doesn't swamp your real categories, and the six-month trend line stops spiking in whichever month the bill happened to land.
- Daily Planner — a planned bill still appears at its recorded amount in the calendar and selected day's activity. The portion paid from planned savings does not reduce today's everyday spending money or the Last 7 days total under Spending trends. Open a selected day's What counts toward today's plan? breakdown to see the amounts.
- Paycheck Planner — each paycheck sets aside its own share of your Planned Expenses instead of one paycheck absorbing the whole bill. A $300/month planned expense takes about $138 from a biweekly paycheck. This is true whether you auto-fill a pay period, sync it later, or let the app create it for you — all of them work the same way, so the number won't shift on you after transactions arrive.
- Reports — the report on screen splits the two apart. The CSV export deliberately does not: amounts in the file stay exactly as your bank recorded them, with two extra columns (
PlannedandFunded Amount) marking which rows a fund paid for. It's the file you'd hand an accountant, so it stays a record of what actually happened. - Alerts and the assistant — spending checks compare like with like, so an annual insurance premium is no longer reported to you as “Insurance up 1800% this month”.
Part-funded bills are split, not hidden. If an $1,800 premium arrives when your envelope holds $400, exactly $400 counts as planned and the remaining $1,400 stays against this month — because that part really did come out of this month's money. The app never quietly removes a bill you hadn't finished saving for.
What this does to your savings rate. Your savings rate is measured against what the month actually cost, which means the amount you set aside this month, not the bill you happened to pay this month. Paying a large planned bill therefore doesn't wreck the figure, and setting money aside doesn't inflate it — each month is charged the same steady amount it genuinely committed.
Daily Planner
The short summary at the top shows how much is left in today's everyday spending plan. It is a budget estimate, not an account balance. The calendar below shows what was recorded on each date, including bills.
Reading Today's Summary
- Today's target: spending money left at the start of today, divided by the days left in the month, including today.
- Spent on everyday purchases: purchases recorded today, less any portion paid from planned savings. Bills you added as recurring are already allowed for by the plan.
- Left for today: today's target minus today's everyday purchases. An expensive day adjusts the target for the days ahead.
Open How this is worked out to see the exact division and source of your plan. Check a purchase shows what an extra purchase would leave today. Open Spending trends for the remaining monthly amount and a month-end estimate.
Where the Budget Comes From
Open Spending plan settings under the calculation to choose your source:
- Your income settings: monthly income less your savings target, with recurring bills reserved from the remainder.
- Your category budgets: the total from the Budget page, less recurring bills covered by those categories.
- Your custom daily amount: the amount you choose for everyday purchases after allowing for bills yourself.
A saved custom choice takes priority over category budgets. If none of these is set up, the page asks you to create a plan instead of displaying an invented allowance.
Using the Calendar
- Month and week views: a day shows recorded spending and, where relevant, income or a scheduled bill. Calendar spending includes bills so it describes what actually happened.
- Selected day: click or tap once to see that day's transactions and scheduled bills. Choose a transaction to open its details, or choose Add to record one for that date.
- Today: the button returns to the current date. The summary always describes today while the selected-day panel describes the date you chose.
Add rent, loan payments and other fixed costs on the Recurring Bills page. The planner can only allow for bills it knows about. Payments from Planned Expenses appear in the calendar; the portion paid from planned savings does not reduce your everyday spending amount.
Debt Payoff Planner
Formulate an optimal repayment strategy. The Debt Payoff Planner runs complex waterfall simulations comparing standard repayment methodologies.
Repayment Strategies
- Debt Avalanche (Recommended): Directs extra funds to the debt with the highest interest rate. Minimizes total interest paid.
- Debt Snowball: Directs extra funds to the smallest debt balance. Maximizes early motivational victories.
- Custom Priority: Directs extra funds based on custom priority rankings configured by you.
Simulating Extra Payments
- Add all active debts (balance, original amount, interest rate, minimum payment, and due date).
- Input your total monthly debt budget, including every minimum payment. Any amount above the required payments accelerates repayment.
- One-time Extra Payments: Log unexpected cash windfalls (bonuses, tax returns) on specific future dates in the Extra Payments drawer to see how it accelerates your debt-free date.
- Compare the payoff schedules, interest summaries, and payoff curves in real time.
Paying a Loan You Track by Hand
When a loan or card has no bank connection, nothing reports its payments: your bank only shows the withdrawal from checking. Link that withdrawal to the debt and the app records the payment on the loan account for you, so the account balance and the Debt Planner both go down.
- Open the payment from your checking or savings account in Transactions.
- Under Additional Details, set Debt Payment Link to the debt. The form tells you it will also record the payment on the loan account.
- Save. The loan account gets a matching payment marked Auto, and the checking payment shows Recorded on the loan account.
- To have every payment linked as it syncs, add a rule under Rules & Bills that matches the payment's description and sets Link to Debt. Leave Target Account on Don't change.
- Accounts that work this way show an Auto-records payments badge on the Accounts page.
- The recorded payment follows the checking payment. Clear the Debt Payment Link, or delete the checking payment, and it is removed and the balance goes back up. It can't be edited or deleted on its own.
- It counts as a transfer, not income. The checking withdrawal stays an expense, so a loan's interest still counts in your spending.
- The whole payment comes off the balance, but part of a real loan payment is interest. Compare with your lender's statement now and then, and use Reconcile Account to match it.
- Loans connected through Plaid or SimpleFIN are left alone: the lender reports their balance, payments included.
- If payments were linked to a debt before you linked the debt to its account, the Debt Planner asks whether to record them on the account. Choose Cancel if the account's balance already includes them.
Build a Debt Plan with AI
Choose Plan with AI to compare your current plan with highest-interest-first and smallest-balance-first strategies. Select a goal: save on interest, get an early payoff win, or keep more breathing room. Analyze 3, 6, or 12 completed months of personal income and spending. Review the estimated living costs, current budget limits, recurring bills, and planned expense contributions; override income or costs if your history is incomplete. Set a monthly cash cushion and your total payment amount.
Choose which debts receive extra payments. Linked mortgages and student loans start unselected; all required minimum payments remain covered. Once selected debts are cleared, other debts continue at their minimum payments. You can add a one-time payment to an existing scheduled extra and compare the estimated interest, payoff timing, and first-month payments before saving.
Confirm that the payment fits your finances, then choose Apply debt plan to update the schedule and charts. Restore previous plan restores the settings and extras from before your last advisor application, including after a page reload. If balances or settings change while you review, generate a fresh plan before applying. AI explanations use the configured Debt payment plans task in administrator AI preferences; calculations remain available when AI is unavailable.
Projections assume entered rates and payments, monthly interest, and no new borrowing. Mortgage taxes and insurance remain reserved after payoff. Incomplete account history can overstate affordability, and lowering a budget limit alone does not create money for an extra payment. Property and investment activity, transfers, and payments linked to debts in this planner are excluded from living costs. Unlinked loan payments stay reserved; review any overlap with your minimums. Review uncategorized bills for overlap and student-loan repayment terms before committing extra payments.
Recurring Bills Tracker
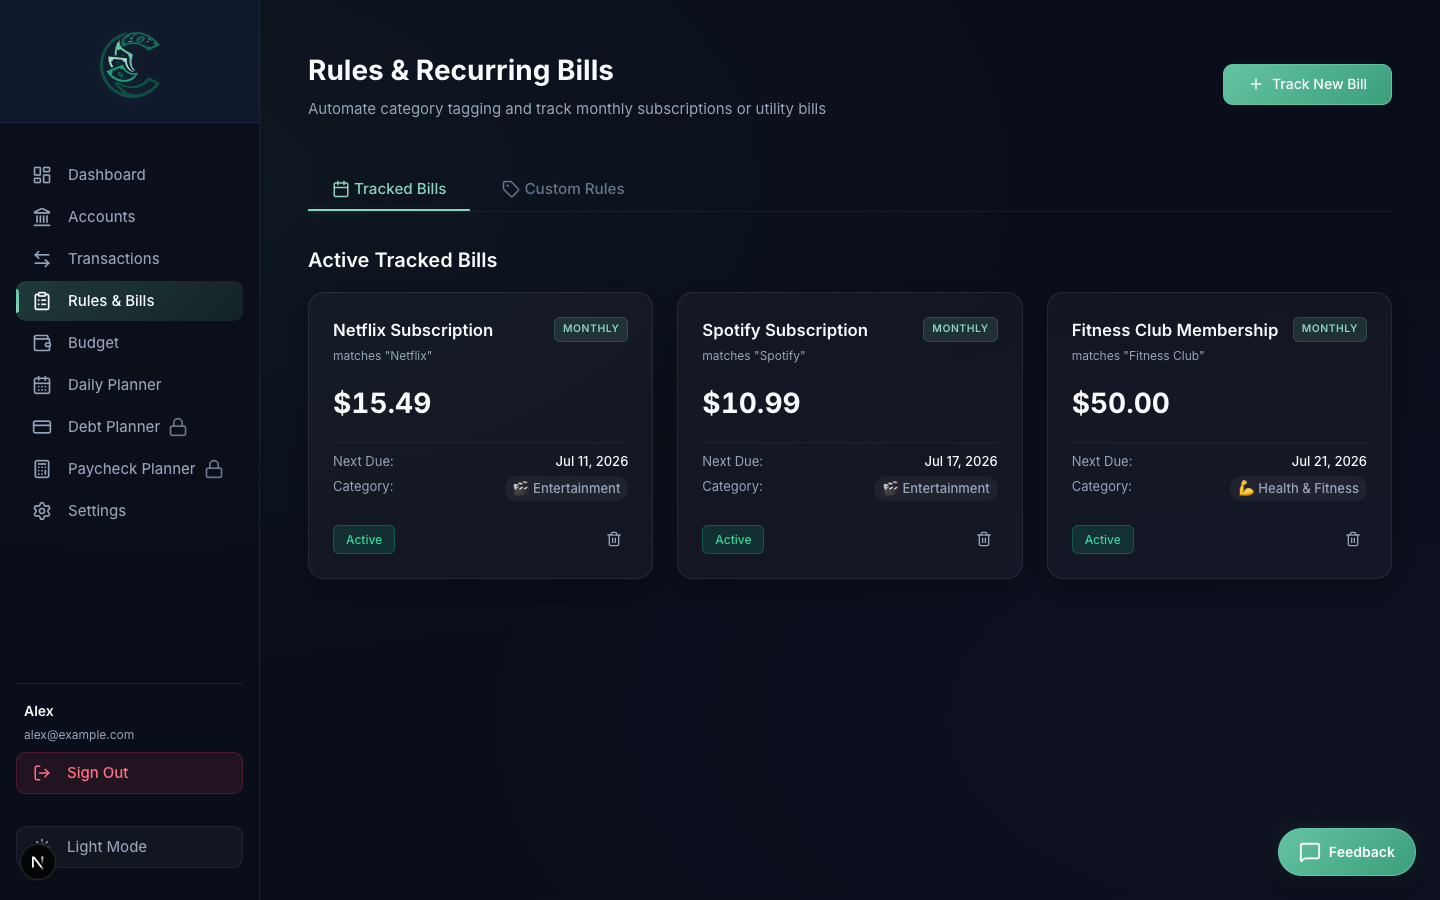
Monitor your active subscriptions, utilities, and regular payments. The app automatically scans transaction logs for recurring patterns.
Subscription Scanner
The system runs auto-detection scans against your past 90 days of transactions. It identifies matching intervals, amounts, and vendors, and recommends adding them as recurring bill items so they can be allowed for in your daily spending plan.
How Keywords Match
Rule keywords and bill matchers work the same way as Spending Search. Capitals, spaces and punctuation are ignored, so Whole Foods also catches WHOLEFOODS MKT. Each keyword has to start where a word starts, so UPS no longer matches STARBUCKS CUPS & MUGS and a tenant named Ann no longer matches an ANNUAL FEE. Separate alternatives with | or a comma. A rule can also leave out descriptions containing some terms, for example Amazon but not Amazon Prime.
Household Payperiod Planner
Co-manage finances with partners or family members. Set up pay periods, designate individual paychecks, and pool resources seamlessly.
Splitting Resources
- Household Members: Link users and configure transactional tag mappings (e.g.
#marco-salary) for automated income attribution, plus each member's Personal Spending Category so their own spending is kept out of the shared household total. - Savings and Checking Splits: Set fixed amount or percentage allocations to joint checking/savings directly from individual paychecks.
- Payperiod Budgeting: Align budget cycles with physical pay periods rather than standard calendar months to avoid cash flow bottlenecks.
Automated Pay Period Creation & Smart Drafts
You never have to manually remember to create a new pay period on payday. The system runs an automated background scheduler that monitors your configured Pay Frequency and Anchor Pay Date:
- Automatic Draft Generation: On the morning of your scheduled payday, the scheduler automatically creates a new Draft Pay Period in the background.
- Intelligent Auto-Fill: The draft period automatically aggregates household expenses (from your monthly budget targets or actual transaction spending) and matches member incomes by scanning for transactions tagged with each member's designated keyword.
- Draft Alert Banner: When you open the Paycheck Planner or view your Dashboard widget on payday, you will see a prominent amber Draft Pay Period banner showing the pre-calculated waterfall and member payouts.
- 1-Click "Approve & Settle": Once your paycheck deposits have cleared your bank feed, click "Approve & Settle" with one tap to finalize the pay period into your permanent history. You can also click "Sync with Bank" at any time to re-scan for newly cleared transactions before approving.
1-Click Pay Period Sync & "Sync All"
Because pay periods save a static snapshot at the moment they are recorded, new or late-clearing transactions imported after creation can be synced into existing pay periods with a single tap:
- Current Period Sync: Click the "Sync Period" button next to "Edit Period" on the Current Period view to re-aggregate expenses and member incomes from the latest transactions.
- History Row Sync: In the History & Trends list, click the sync icon () on any past pay period to update it directly.
- "Sync All" Batch Action: Click "Sync All" at the top of the History list to re-synchronize all past pay periods at once (ideal after running a bank sync or importing bulk CSV history).
- Smart Source Respect: Syncing respects the period's original configuration: periods using transaction spending pull new expense totals, periods using budget targets refresh active budgets, and manually entered incomes or expenses are preserved if no matching transactions exist.
Accurate Spending & Credit Card Payment Exclusions
When selecting "Use Actual Spending (Transactions)" in the pay period form, the system ensures your numbers are 100% accurate without double-counting:
- Credit Card Payoffs Excluded: Bank account withdrawals used to pay off credit cards (e.g. Bank of America Online PMT, Amex EPayment) and internal transfers are automatically excluded, because the actual individual purchases on the cards are already captured in your expenses.
- Rental Property Isolation: Rental property activity is excluded so large property repairs or tenant rent payments never distort your personal household cash flow.
- Mortgage & Housing Preserved: Real household living obligations like your home mortgage payment are preserved as shared household expenses.
Personal Expenses & Loan Allocation
Individual obligations—a personal loan, or simply one partner's own discretionary spending—can be allocated directly to the responsible member rather than being split proportionally. The planner decides who a charge belongs to in two ways, in order:
- Member Tag: the transaction carries that member's Default Tag—the same tag used to match their paychecks. This wins wherever both rules apply, so it doubles as a one-off override for a charge filed in the wrong place.
- Personal Spending Category: the transaction is filed under the category linked to that member, or any sub-category beneath it. If you already keep a
Personalbudget with a sub-budget per person, point each member at their own sub-category and your existing filing does the work—there is nothing to tag per transaction. - Everything Else Is Shared: a charge matching neither rule is a shared household expense. Leave a member's category on Not tracked separately and they are matched by tag alone, exactly as before.
- Dedicated Member Deduction: Personal expenses are deducted directly from that member's payout share at the end of the waterfall, ensuring each partner pays their own personal loan without burdening the other partner.
- Budget-Sourced Periods: if your pay periods draw expenses from budget targets rather than actual transactions, a linked member's own budget is held out of the shared total as well. Avoid setting an amount on a parent
Personalbudget whose children already carry amounts—that is the same money counted twice, and the planner holds it out rather than guessing whose it is.
Changed in v4.5.2
Earlier versions also matched a member's name against the transaction description, which charged shared spending to whoever's name it happened to contain — a grocery run to SAM'S CLUB landed on Sam, and Jimmy John's on Jim. That rule has been removed in favour of the category link above. If you were relying on it, set each member's Personal Spending Category and re-sync your open pay periods.
Automated Deficit Carryover
If a member experiences higher personal expenses, reduced income, or high shared costs that result in a negative payout (an Amount Owed), the deficit automatically carries forward into their next pay period:
- Seamless Offsetting: In the subsequent pay period, the prior deficit is automatically deducted from that member's new positive payout (e.g. a
-$100deficit followed by a+$300base payout nets out to a true+$200payout). - Keeps Joint Accounts Whole: Automatically reconciles household cash flow without requiring manual checking-to-checking transfers between partners on payday.
- Transparent Line Items: The Member Payout Card explicitly displays a Prior Period Deficit line item so both partners can easily trace the calculation.
Properties Pro
Track rental properties in the same ledger as everything else. Expenses you already sync from your bank are tagged to a property once — there is no second ledger to maintain and no double entry — and your Schedule E totals build themselves as the year goes on.
Getting Set Up
- Add a property on the Setup tab, then add a unit for each rentable space. Rent is tracked per unit; expenses are recorded at the property level.
- Import an existing workbook if you have been tracking a property in Excel. The importer reads expense sheets with a
Date | Payee | Costheader, the Overview utility grid and annual totals, and the Rents sheet. You review everything before it is saved, and any charge already in your ledger from a bank sync is tagged rather than duplicated. - Link the mortgage to a debt in the Debt Planner so it is not tracked in two places. Mortgage interest is now calculated automatically from the property's linked mortgage debt's amortization schedule.
Ending the Double Entry
The Inbox tab lists spending that has not been assigned to a property yet, and suggests where each charge probably belongs based on your rules and on where you filed that payee before. Assigning is one click. If a charge is personal, not property spending — a grocery run, a coffee — click Mark personal instead; it leaves the inbox for good and nothing else about the transaction changes.
The list covers one year at a time — the year selector at the top of the page, not the Inbox itself, decides which. If a charge you expect is not here, that is the first thing to check. Use the search box to find a payee across the whole year (type Water Department and the list narrows to those charges); Select all then applies to what you searched for, so a year of one recurring bill can be filed in a couple of clicks. Long lists load 150 rows at a time with a Show more button; nothing is hidden, and the header always says how many are waiting.
For a payee that recurs, create a rule under Rules & Bills instead of clicking every time. A rule can do either one thing automatically, going forward:
- Mark personal — for example, a rule matching "Trader Joe's" keeps every future grocery run out of the Inbox the instant it syncs, the same as clicking Mark personal by hand.
- File to a property — pick a property and Schedule E category, e.g. HomeDepot on AMEX → 21 Crosby / Repairs. By default this only drives the Inbox's suggestion chip; you still click to accept it. Tick File automatically at sync on that rule to skip the click too. It's off by default — on every rule, old and new — because this decides what lands on Schedule E, so turning it on is a per-rule choice you make once you trust that rule to be right every time.
A charge that is part property and part personal. Some bills are both — a power bill covering the duplex and your own half of the house, a hardware run split between two properties. Split the charge (on the transaction itself, or with a splitting rule), and the Inbox lists each part of it as its own line, tagged Split 1/2 · of $120 so you can tell a $100 line belongs to a larger bill. File the property part to a property and Schedule E category and mark the personal part personal — each part is answered on its own, and the property part reaches Schedule E while the personal part never does. A splitting rule can point each of its parts at a property, so the answer is given once rather than every month; as with any property rule, it only files itself without asking if you tick File automatically at sync on that part. Re-running a rule never overwrites a part you filed by hand.
Either way, tick Apply retrospectively when you create the rule to reclassify a whole year of past charges at once. If the same payee means different things depending on which card it hits — a Home Depot run on the AMEX is always 21 Crosby, but on your personal card it's your own house — set Only Match Transactions From on the rule to that one account. The rule then ignores the same charge everywhere else, and an account-scoped rule always takes priority over a generic one for the same keyword.
Repairs vs. Capital Improvements & Depreciation
A repair is deducted in the year you pay it. A capital improvement — a roof, an HVAC system, a new kitchen — is not: it adds to the property’s cost basis and is recovered through depreciation. Marking a charge as a capital improvement keeps it out of the current year’s deduction and reports it separately, so the deduction is not overstated and the basis is still there when you eventually sell.
Depreciation & Cost Basis: Schedule E line 18 computes real IRS mid-month-convention straight-line depreciation. The building (from purchase price minus land value) and every capital improvement each depreciate independently from their own placed-in-service date, over 27.5 years (residential) or 39 (commercial). A "Depreciation & Basis" section shows each asset's basis, this year's amount, accumulated depreciation, and remaining basis. This computed figure can be overridden per year with a real accountant's number.
Rent Roll & Leases
- Start from a signed lease Pro: upload the signed PDF under the property’s Documents tab with the Lease category, then open Add lease and choose it under Start from a signed lease → Read lease. AI lease extraction fills in the dates, monthly rent, due day, security deposit and tenants, with a confidence score and a note on any value that did not check out. Nothing is saved until you review every field and submit. The control appears only when AI document reading is configured.
- Lease History & Tenants: Rental units keep a real lease history — one record per lease term, each with its own tenant(s) (name, email, phone), monthly rent, and security deposit. Occupancy is derived from whether a lease covers today.
- Generate a year of charges from each unit’s active lease (rent and due day). Months with no covering lease are marked vacant rather than owed.
- Find rent payments scans your deposits. A deposit matching both the amount and a description naming the tenant is linked automatically; one matching on amount alone is suggested for you to confirm.
- Late rent counts for the month it was owed for. A deposit is considered for a month from ten days before its due date until roughly six weeks after, so rent paid on the 27th still belongs to that month rather than reading as an early payment for the next one. Because those spans overlap, a deposit that two months could both claim goes to the older month that is still unpaid — money arriving while a month is outstanding pays that month first, which is how a rent balance normally works.
- Link a deposit yourself when the automatic match got the month wrong, or when rent turned up so late that nothing was suggested. Open the month, choose Find a deposit, and every deposit not already tied to a month is listed — nearest that month’s due date first, each labelled with how early or late it arrived. Search by description or amount to reach a deposit from any date at all. To move one that landed on the wrong month, unlink it there first, then pick it here.
- Cash never reaches your bank, so mark it paid on the month itself. Leave “also record this as income” ticked, or the money will exist only in the rent roll and your property income will read low everywhere else.
- Each cell shows its state: paid, partial, late, due, or vacant.
Schedule E and Annual Figures
The Schedule E tab is a live profit-and-loss statement: income, expenses by IRS line, and net operating income. Select any line to see the individual charges behind it.
Property taxes, and insurance stay manual, because they usually cannot be reconstructed from transactions — taxes and insurance are often escrowed inside one mortgage payment. Enter them under Annual figures. Mortgage interest (Schedule E line 12) computes from the property's linked mortgage debt's amortization schedule, but can also be overridden with a manual 1098 figure.
Use Schedule E in the page header to export the line items, the underlying ledger, or the rent roll as CSV for your preparer.
Keeping Personal Numbers Readable
Property income and expenses are left out of your Dashboard, Budget, and Daily Planner totals by default, so a large repair or a month of rent does not distort your household figures. A global Personal only / Including property activity switch on all three folds them back in. This choice only appears once you own a property.
Shared Expenses & Co-Owners
Add a co-owner on the Setup tab with their ownership percentage, and every expense you record on that property splits automatically by that percentage — nothing to do per-charge. A new co-owner shares expenses from their Shares expenses from date, which defaults to the day you add them, so they aren’t billed for older expenses. Tick Include all past expenses (or pick an earlier date) when they should be. The Shared Expenses tab is the ledger for that: a running balance per co-owner, and every expense broken down by who owes what.
A bill that is only partly the property's is shared on that part alone. If a $120 power bill is $100 for the duplex and $20 for your own place, file the $100 half to the property (see the Inbox above) and the ledger lists it as a $100 shared expense, tagged of $120.00 so it is clear where the rest went. Co-owner shares are worked out from the $100, not the $120.
- Choose who is on an expense. Some bills are not shared with everybody. Under the property on an expense you will see a Shared with row of names — you and each co-owner — all switched on. Tap anyone to switch them off and the bill is split between whoever is left, in their usual proportion: a $60 internet charge on a property you own 34% of with two housemates at 33% each becomes $29.55 for the one who is on it and $30.45 for you. The line underneath always shows what each person ends up owing before you save. If you would rather cover the missing person's portion yourself instead of splitting it with the others, switch Their portion to I cover it. You can also switch yourself off, which makes the expense entirely your co-owners'.
- Make it stick for a recurring bill. The same Shared with row appears on automation rules (Recurring → Rules) and on a property's Recurring Expense Templates. Set it once there and every future charge that matches lands with the right people on it — you never touch the monthly internet bill again.
- Override a split from the ledger when the automatic percentage is not what actually happened for one particular charge — the gear icon on any pending row lets you type in each co-owner's exact amount instead. Your own share is shown there too, as whatever the co-owners do not cover.
- Someone who has already paid cannot be taken off. If a co-owner has settled or is disputing their share, their name is greyed out — unsettle it first. Nothing that has already changed hands gets rewritten by an edit somewhere else.
- Cover an expense yourself: sometimes you make a purchase and do not want a co-owner paying their usual share of it. Tick "I'll cover this myself — don't split with co-owners" on the expense form when you add or edit it, or use the Cover This Myself button on any pending row in the ledger to do the same thing after the fact. Either way, nothing is deleted — the co-owner's share is marked waived so it still shows up in the ledger and their statements at $0.00, with a record of what got excluded. A share that is already settled is never touched by this.
- Changing ownership never rewrites history. If you change a co-owner’s percentage or their start date, only pending shares are recalculated. Settled, waived and disputed shares keep their amounts.
- Settle and link bank deposits: Click Settle on any pending expense row (or select multiple checkboxes and click Settle Selected in the toolbar) to open the Settle & Link modal:
- Who the payment is from: pick the co-owner (or co-owners) who paid under Payment From. Only their shares are settled; everyone else stays pending. Each co-owner in the ledger also has their own Settle button, and the Settlement Inbox picks the right co-owner for you.
- Match real bank deposits: The modal searches your synced bank transactions and highlights deposits matching the exact dollar amount (e.g. Zelle, Venmo, wire transfers, or checks).
- Multi-installment payments: If a co-owner sends 2 or 3 installments (e.g. two $1,000 Zelle payments for a $2,000 tax bill), select multiple deposit checkboxes to link all of them to the settlement.
- Bundled reimbursements: If one incoming payment covers multiple bills (e.g. $2,500 for property taxes + insurance), select both expenses and link them to that single deposit.
- Partial payments: If a co-owner only pays a portion of what is owed, the paid amount is settled against the deposit and the remaining balance is automatically kept as an active pending share on the property ledger.
- Keeps personal income accurate: Linked deposit transactions are automatically tagged as Transfer / Reimbursement so they don't falsely inflate your household income or monthly budget.
- Inspect applied bank deposits: Click any settled or partially settled row in the ledger (or the eye icon in Actions) to open the Settlement Details modal. You can view every linked bank transaction (bank account name, date, description, payment method, reference note, and applied amount) and co-owner allocation breakdown.
- Partial settlement tracking: When an expense is partially covered, it remains open on your ledger with an amber Partial ($X.XX due) badge and an immediate Settle Remainder action.
- Unsettle & re-open: If a settlement was recorded by mistake, click Unsettle & Re-open inside the Settlement Details modal. This restores the full pending balance, consolidates any partial splits back together, automatically removes the Transfer flag on the bank deposit, and clears the settlement memo.
- Settlement Inbox: When bank-synced income matches a pending share, a banner appears at the top of the tab. Click Review & Settle to open the modal with the deposit pre-matched, or use 1-click confirmation.
- Notify a co-owner on demand from the bell icon on their balance card — it sends an itemized breakdown of what they owe, not just the total. Instant Delivery Receipts: Clicking the bell provides an immediate confirmation toast with the recipient's email and timestamp.
- Live Delivery Indicators: Co-owner balance cards display real-time notification status ("Notified today at 2:15 PM", "Notified Sep 5", or "Never notified"), updated immediately upon sending.
- Notification Delivery & Audit Card: Click the balance card itself to see the itemized breakdown on screen without sending anything. This modal also includes a dedicated audit card displaying recipient email, schedule, last notified timestamp, and owner confirmation mode.
- Set a notification schedule per co-owner under Setup → Edit Co-Owner: Immediate, Daily, Weekly, Monthly, or Muted, plus whether they should also get a text. On whatever cadence you pick, they automatically get an itemized email of what they currently owe — nothing is sent if their balance is $0.
- Owner Email Confirmation Preferences: You can configure how you are notified when an email is sent to your partner. Options include In-App Status Only (keeps your inbox completely clean), Lightweight Delivery Receipt (sends a single-paragraph delivery confirmation), or Full CC Copy (sends a full CC of the itemized statement).
Verifying Co-Owner Notifications
The 3-in-1 Partner Notification Verification system provides full visibility into when and how your partners are notified about shared expenses, without filling your own inbox with duplicate emails.
- Live Status on Balance Cards: Each co-owner's balance card on the Shared Expenses tab displays a real-time "Last notified" status (e.g., "Notified today at 2:15 PM" or "Notified Sep 5").
- Instant Confirmation: When you manually notify a partner by clicking the Bell icon, an instant confirmation toast appears with their email and timestamp, and the card updates immediately.
- Notification Delivery & Audit Card: Clicking a co-owner opens the detail modal, which includes a dedicated audit card showing the recipient's email, their notification schedule, the exact last notified timestamp, and your confirmation mode.
- Owner Email Confirmation Setting: You can configure how you receive delivery receipts. Go to Setup → Edit Co-Owner to choose between In-App Status Only (keeps your inbox clean), Lightweight Delivery Receipt (a short confirmation email), or Full CC Copy.
Home Projects Pro
Plan a remodel, a repair or a build against a budget, compare contractor quotes side by side, and link the charges as they land. Each project tells you, in one sentence, whether it is on track, and whether paying for what is left still leaves enough in the bank. Open it from Home Projects in the sidebar.
A second view, not a second ledger
Linking a transaction to a project never changes it. It keeps its category, still counts in that month’s budget, and appears in every report as before; the project simply adds it up alongside the rest of the work. For a big job you have been saving for, pay it from a Planned Expense (Budget → Planned Expenses), which already keeps the bill out of the month it lands in.
Starting a Project
- Click New project and pick what kind it is: kitchen, bathroom, roof, deck or patio, landscaping, flooring, heating & cooling, painting, repair, or something else.
- The kind fills in the usual budget lines (a kitchen gets Cabinets, Countertops, Appliances, Plumbing and so on) by name only; you add the estimates from your own quotes. It also sets a sensible contingency (15% for kitchens and baths, where opening walls turns up surprises; 10% otherwise).
- Tick A starter checklist for the hiring basics in order: three written quotes, license and insurance checks, permits, a written contract with a payment schedule, a final walkthrough before the last payment, and keeping the warranties.
- Capital improvement marks work that adds value or extends your home’s life, such as a new roof or a remodel. Those costs raise your home’s cost basis, which can lower the taxable gain when you sell; routine repairs and repainting usually do not. The projects page keeps a running total, and Export downloads every payment as a spreadsheet for your records.
Budget, Contingency and the Forecast
Enter a Total budget (everything you are prepared to spend, contingency included), or leave it blank and the budget becomes your line estimates plus the contingency. Either way the split is the same: a $27,500 budget at 10% plans $25,000 of work and holds $2,500 back.
Four numbers sit at the top of every project. Click any of them to see how it was worked out.
- Committed — what you have agreed to pay: accepted quotes plus approved change orders.
- Spent — the linked transactions, net of returns and credits such as an insurance payout or a rebate.
- Forecast — where the project is heading. For each budget line it takes the largest of the estimate, what is committed and what is spent, so a $16,900 contract with $5,000 paid is heading for $16,900, not $21,900. A line nobody has quoted yet is assumed to cost its estimate, so the forecast does not look rosy just because the bills have not arrived.
The banner under the title gives the project’s health and why: On track; At risk when most of the contingency is spoken for, spending is well ahead of the checklist (say 65% of the budget spent with 25% of the tasks done), or pending change orders would push it over; Over budget when the forecast passes the budget; Behind schedule once the target finish date has passed. It also points out which lines are over their estimates, and when the cheapest quote still on the table is more than its line was estimated at.
Linking What You Spend
- On the Expenses tab, Link transactions lists charges from the project’s dates (from 90 days before it started, since deposits are paid ahead) and searches two years by description, note or amount. Pick several at once and choose the budget line they belong to.
- Suggested for this project finds likely charges for you: payments that match a contractor you have a quote from, purchases at home improvement and building supply stores, and charges in repair or maintenance categories. Click Link, or the hidden-eye button if it is not part of this project.
- Part of a receipt can be linked. Give the amount for the project (say $200 of a $480 Costco run) and the rest stays free for another project.
- You can also link from any transaction: open it and use Home Project at the bottom of the drawer. That saves right away, separately from the drawer’s Save button.
- Transfers between your own accounts, such as a credit card payment, cannot be linked; link the purchases they paid for instead, or the same work is counted twice.
Comparing Contractor Quotes
Add each bid on the Quotes tab with what you know: price, deposit asked, earliest start and length, workmanship warranty, whether the contractor is licensed and insured, and whether materials, permits and cleanup are included. Not sure is a valid answer and is treated differently from no. Attach the quote PDF or a photo of it.
Each budget line with quotes gets its own card. Its header says where that decision stands (Comparing, Accepted or All declined) and sets the bids, or the accepted contract, against the line’s estimate. Inside, the line’s quotes line up side by side; on a phone, one card per quote. The comparison points out strengths (lowest price, longest warranty, earliest start, your top rating) and the things worth a question before you sign:
- A bid 25% or more under the median of the others, which often leaves something out or comes back as change orders.
- A deposit of more than about a third of the price. Some states cap deposits on home improvement work; paying as work is completed protects you.
- No license, no insurance, or no warranty, and work one contractor leaves out that another includes.
- A quote that has expired, or expires within a week.
When there are two or more open quotes, the comparison suggests the lowest price with no red flags and says so; the choice is yours. Getting at least three written quotes is the usual advice, and the page reminds you while you have fewer.
Contracts and Change Orders
Accept a quote to make its price committed cost on its line. The dialog offers to decline the other quotes for that line, to set the line’s estimate to the accepted price, and to move a project still in planning to In progress.
An accepted quote shows as a contract: price, approved changes, what you have paid against it and what is left. Once a line has a contract and no quote left open, its comparison folds away under the contract; Compare all quotes brings it back. Record a payment by linking it on the Expenses tab with Payment to set to that contractor. Add a change order whenever the work changes after signing, as an extra cost or a credit. A proposed change order is not counted until you approve it, but the health banner tells you what it would do to the forecast.
Tasks and Files
- Tasks is a checklist with optional due dates. The share done is the project’s progress, which its health compares with how much of the budget is spent. Overdue tasks are flagged.
- Files keeps quotes, the signed contract, permits, invoices, warranties and before, progress and after photos with the project. Photos are resized before upload. Files are private to your account and are deleted with the project.
Paying for It
The Paying for it card on the Overview tab answers whether you can afford what is left. It shows what is still to pay, the cash in your checking and savings now and after paying it, and how many months of your usual expenses that leaves. Three months is the usual floor for an emergency cushion, so it warns below that and flags anything under one month or more than you have.
- Link a Planned Expense you are saving into, and the card shows how much is already set aside and what each month needs to be ready in time.
- Link the loan, HELOC or card from the Debt Planner you are borrowing on and enter the amount to borrow. Charges that land on that account count against it, and the card estimates the monthly interest.
- When the cushion runs low, it also tells you how long your recent monthly surplus would take to save the rest.
Alerts, the Dashboard and the Assistant
- The AI Inbox raises a project that goes over budget, has used most of its contingency, passes its target finish while in progress, or has a quote about to expire. Each alert is reported once and again only if it gets worse.
- The Dashboard shows your active projects with their health and how much of each budget is spent.
- Ask the AI assistant things like “How is the kitchen remodel tracking?”, “Which roofing quote should I take?” or “Can I afford to finish the bathroom?” It answers from the same figures the page shows.
- A partner with joint-manager access can edit projects; a read-only partner can view them.
Investments
The Investments page brings what you own into the same place as everything else you track. Its tabs are Portfolio, Smart Money, Watchlist, Market Pulse, Research, Money Advisor, and, when enabled by your administrator, Paper portfolio.
Not Advice, and It Cannot Trade
The app has no connection to any broker that could place an order — the bank link it uses is read‑only by design. Nothing on this page is investment advice — it describes what you already own and what the arithmetic says. Every decision stays yours.
Cryptocurrency
Coins sit alongside your shares, in the same portfolio and the same totals. The one thing to know is that a crypto symbol carries the exchange it trades on, because the same coin has a slightly different price on every venue and the app will not guess which one you meant. So Bitcoin is BINANCE:BTCUSDT, not BTC.
You rarely need to type that. Search for BTC or bitcoin in the Watchlist box and the coin is offered at the top of the results, labelled as crypto, next to any shares that happen to share the name. Picking it fills in the full symbol for you. If you are adding a position by hand and type a bare BTC, the form notices and offers you the coin instead.
Why a bare ticker is worth avoiding
BTC, ETH and SOL are all real stock tickers belonging to companies that have nothing to do with the coins of the same name. Type BTC and you would be tracking a share worth about thirty dollars, not Bitcoin — and because that is a perfectly valid price for a perfectly valid stock, nothing further down the line could tell it was the wrong thing. That is why the app steers you to the full symbol rather than quietly picking one.
- Prices and charts both work, and keep working at the weekend. Live prices come from the same place as your stock quotes; the price history behind a coin’s chart comes from the app’s history provider, which spells pairs its own way — the translation is automatic. Shares are only re‑priced while the market is open, because a closed exchange means the price cannot have moved, but coins trade around the clock and are refreshed overnight and at weekends too. Refresh prices fetches immediately whenever you press it.
- Small amounts stay accurate. Crypto quantities keep eight decimal places rather than the four a share count uses, so a fraction of a coin isn’t rounded away, and prices below a dollar show enough decimals to still be a price rather than
$0.08. - Only dollar‑priced pairs. You can track a coin against dollars or a dollar stablecoin. A pair priced in another coin — ETH against BTC, say — is refused, because its price is a number of Bitcoin and adding that to a dollar total would be meaningless.
- No research reports, and no company news. Those read filings made with the SEC, and a cryptocurrency has no company behind it to file them. Asking for one tells you so rather than producing an empty report.
Getting Your Holdings In
There are two ways, and you can mix them freely:
- Link a brokerage account under Accounts, the same way you link a bank. If your brokerage reports positions, each sync brings your holdings in with it — symbol, share count, and current value — and keeps them updated. Not every institution reports positions; if yours doesn’t, the account still syncs its transactions normally and you can add positions by hand.
- Add a position manually with the Add holding button. Enter the Symbol (e.g.
VTI, orBINANCE:BTCUSDTfor a coin), pick the Account it sits in, and enter your Shares. Total cost basis, Current value, and Notes are all optional — cost basis is what unlocks your gain/loss figures, and current value is only used as a stand‑in until live prices arrive.
How manual and synced positions coexist
- A position you typed is only ever replaced by the same position from your brokerage. If you hand‑entered 10 shares of VTI in an account your brokerage doesn’t report on, no sync will touch it.
- A sync that reports no positions never empties an account. A brokerage having a quiet day, or an outage, will not silently wipe out your portfolio.
- Closing a position sets it to zero shares rather than deleting it, so its history stays intact and your past portfolio values remain correct.
Portfolio
The summary cards across the top show Total value, Today (the day’s change), Unrealized gain/loss, Cost basis, Largest position, and Last bank sync. Below them, a chart of your portfolio’s value over time and a table of every position with its shares, price, value, and gain or loss.
- The value chart is drawn from your own history, not from a market data provider — the app records a snapshot of each position as prices come in. That means it starts empty and fills in from the day you begin tracking, rather than showing a back‑filled past that never happened in your account.
- Unrealized gain/loss needs a cost basis. Positions without one still count toward your total value; they just can’t contribute a gain figure.
- Edit or remove any position from the icons at the end of its row.
Smart Money — research politician trades
Start in Politicians and search a name, or choose one of the suggested people with available disclosures. Open a profile to see reported buys and sells, stocks or assets, amount ranges, trade dates and disclosure dates. Choose Details on a row to inspect the filing and reported owner. You can browse recent trades underneath the search and filter them by buys or sells. Following is optional.
Your Following list is private to your signed-in profile. Choose View matched activity there for available disclosures from people and institutions you follow and matches to stocks you own or watch. The Updates area shows private portfolio matches and a weekly investment summary; you can read, snooze or mute updates. These updates stay in the app. Institutions has a separate search for SEC managers by name or CIK, with Track & Follow and progress while reports are collected.
Institutional quarter comparisons show reported positions that appeared, increased, decreased or disappeared between comparable 13F periods. A 13F is a delayed report of certain holdings, not a transaction record: a decrease does not prove a sale. Congressional disclosures are also delayed and may report a value range. Check the linked source and its filing date before drawing a conclusion. If a provider trade profile cannot be verified against an official member profile, the app keeps them separate.
Open Research tools inside trade details for stock actions, including Watchlist, company details, Research, an investment preview or a paper portfolio when available. Private notes are under Private research note. The Watchlist tracks securities; following a politician does not add their stocks to it. Expand Data sources and coverage for source status and available-history limits.
Watchlist
Use Add a security to search by symbol or company. The filter toolbar groups daily indicators and stock assessments; the result count and Reset filters help you return to all saved securities. Each card separates the current quote, dated indicators and assessments, and your targets and notes. Expand a long note without opening the stock. Choose View stock details for the price chart, key figures, Assessments & indicators, news and editable notes. The Show + / Hide − sections keep deeper evidence and notification controls available.
Follow a symbol you don’t own. Search by symbol or company name, add it, and it appears with its current price alongside the rest of your list.
Choose View stock details on a card to open it. The panel that opens shows a price chart you can set to one month, three, six, or a year; the 52‑week range, market cap, P/E and dividend yield where the provider reports them; a plain‑English summary of what the news has been saying; and the five most recent headlines with what each one means for a holder. If you also own the symbol, the same panel shows your shares, what they’re worth, your gain or loss, and which accounts hold them. Clicking a ticker in the Holdings table on the Portfolio tab opens exactly the same panel.
Click the target icon on any entry to set a low or high price target. Targets are what turn a watched symbol into something the app can raise with you — when the price crosses one, it shows up as an alert in your AI Inbox. An entry with no targets is simply a price you can glance at; it will never generate an alert.
Market Pulse
News for the symbols you hold or watch, collected through the day. Each story carries the ticker it belongs to, a tag for whether it reads as positive, negative, or neutral for a holder, and a one‑line note on why it matters — so you can skim a day’s coverage without opening every headline. Older stories are cleared out automatically after about three months.
Two filters sit above the feed, and they combine:
- By kind — Earnings, Analyst, Product, M&A, or Macro. These aren’t separate feeds; they narrow the one feed to stories of that kind.
- By symbol — a row of tickers for everything you hold or watch. Tap one to see only its news, tap it again to go back to everything. Clicking a ticker on any story does the same thing. The row only appears once you’re tracking more than one symbol.
Why a story can vanish when you pick a kind
The kind is worked out once a day, in the evening, along with everything else the app reads about that story. News collected since last night’s run hasn’t been sorted yet, so it sits under All until then rather than under Earnings or Analyst. If a filter looks emptier than you expected, that’s usually why — nothing has been lost.
What the notes under each headline are. They are not summaries of the article — the app never opens the link. It reads the headline and whatever short blurb the news provider sends with it, and writes one sentence on what that means for someone holding the stock. For the fuller picture, open the symbol itself and read The story so far.
This tab needs a market data key configured by your administrator (see below). Without one, your holdings and totals still work — you just won’t see live prices or news.
The story so far
Inside any symbol’s panel is a short written brief: two or three sentences on what has actually been happening, up to four bullets naming the specific things, and whether the week reads positive, negative, or neutral overall. It is written from the week’s headlines for that symbol, so it answers “what’s going on with this one?” in one read rather than ten.
- It writes itself. The evening run that sorts the day’s news writes the brief at the same time, in the same step — so keeping it current costs nothing extra.
- You can ask for it now. If a symbol has no brief yet, or news has landed since the last one was written, press Summarize (or Rewrite) and it is written on the spot. The panel says when the brief was written, how many headlines it read, and whether anything newer has arrived since.
- It describes; it does not recommend. “Two analyst houses raised their targets after the quarter” is the kind of thing it will say. It will not tell you to buy or sell anything, and if the week was all noise it says that instead of inventing a story.
Research — deeper reports on one company
Market Pulse tells you what happened this week. In Research, pick a company you hold or watch and a report type. The four company reports below use company filings; four additional reports review Smart Money activity, changes since an earlier saved review, two companies side by side, or calculated valuation scenarios. Availability depends on the source data each report needs. The app shows the estimated AI cost before a run.
- Company research brief — the whole picture at a glance: what they do, financial health, recent news, the risks worth knowing.
- Earnings breakdown — the latest quarter against its own history, what drove the numbers, and how management explained it.
- Annual report deep‑dive — reads the 10‑K properly: the business model, the year in numbers, and which risk factors are specific to this company rather than boilerplate every company lists.
- Thesis & risk memo — the strongest honest case each way, with the bear case given the same effort as the bull case, ending in what evidence would settle the question. Deliberately no verdict.
Why these reports can be trusted more than asking a chatbot the same question
Asking an AI to “analyse this company” with no source material is a known trap: it produces something that looks like analysis, with invented figures and arithmetic that quietly doesn’t add up. Four things are done differently here.
- It reads real filings, not its memory. Every run downloads the company’s actual 10‑K or 10‑Q from the SEC first. The report is written from that text, and the instructions require it to write “not available in the provided material” rather than fill a gap from general knowledge.
- It is not allowed to do arithmetic. Every growth rate, margin and comparison is calculated by the app itself from the numbers the company filed with the SEC, then handed over as fixed facts. This matters because a wrong calculation inside confident prose is invisible — so nothing is left for it to calculate.
- Every claim is numbered back to its source. Small markers through the text link to the exact filing section, news story or figure behind that sentence, all listed at the bottom of the report with links. If you doubt a line, you can check it in two clicks.
- Impossible requests are refused up front. The company must be one you track and must actually file with the SEC. Ask for a report on an ETF or a foreign listing and you get a plain sentence explaining why not, instead of a confident report about a company that doesn’t file.
Every report also ends with what it could not see — missing data, sections too long to read in full, material that was already out of date.
What it costs, and how that is kept in check. For reports that use AI, review the displayed estimate and confirm before running. Actual cost depends on the assigned provider/model and input size; an estimate is not an invoice. Some calculated reports use no AI call. There is a cap of ten runs a day. Asking for the same report on the same company twice within half an hour returns the one you already have rather than paying for it again. Finished reports are saved, so the list is a library you can reopen, not a log that scrolls away.
A run takes a minute or two — the report appears in the list below when it is ready, and you can leave the page while it works.
Taking a report with you. Every finished report has a Download PDF button that saves it as a clean, printable document — a proper typeset memo rather than a screenshot of the screen, so the text stays selectable and searchable and the file stays small. It carries the company and date at the top, the numbered sections, whatever the report could not see, and the full source list with working links, plus a footer on every page noting it is research rather than advice.
If you have run several reports on the same company, the dossier button above the report list combines all of them into one document with a contents page — the brief, the earnings breakdown, the deep‑dive and the memo in that order, whichever order you happened to run them in.
This is research, not advice. The reports describe what filings say; they never recommend buying, selling, or how much to hold. A model can still misread a source, which is exactly why every claim is linked back to the original — for anything that matters, read the filing.
Money Advisor — put your next dollar in perspective
Start with Plan my money to enter an amount, use a preset or adjust the slider. Follow the numbered allocation plan, then review Financial health and Rebalancing. Choose Preview a purchase to select a security, purchase amount and funding account. Switching between these workflows keeps your draft and shared amount. Opening an investment preview for a stock takes you directly to the purchase workflow.
Select Calculate preview to see the funding outcome and cash and concentration effects first, followed by all eight before-and-after measures. Expand Company assessments, Trend & momentum and Cash commitments, assumptions and limits for supporting evidence and obligations. Changing an input clears the old result; calculate again to use the new values.
When investment purchase preview is enabled, enter a stock, amount and funding account to see a read-only before-and-after view of position size, sector mix, cash, reserve and obligations. For brokerage funding, enter a cash assumption; the brokerage account total is not treated as spendable cash. The preview shows its stored quote date and any missing inputs. Calculating it does not move money or change holdings.
Enter an amount — type it, drag the slider, or use one of the presets — and the advisor works out where that money would do the most good, using your real balances, rates, and spending. It answers the question people actually have when a bonus or a tax refund lands.
It works down a priority order, only moving to the next step once the one above it is satisfied:
- Starter emergency fund — a small cash buffer before anything else.
- High‑interest debt — every debt above the high‑rate threshold, each named individually with its rate, because clearing a card is a guaranteed return no investment can promise.
- Full reserve — several months of your actual average expenses, calculated from your own spending rather than a guess.
- Tax‑advantaged investing.
- Invest — whatever remains.
- The allocation always adds up to exactly what you entered. No rounding drift, at any amount.
- Steps you’ve already satisfied simply don’t appear. If you already hold six months of expenses in cash, there is no reserve step telling you to save more — the money moves down to the next thing that actually needs it.
- A cheap debt gets an explanation rather than silence. Debt below the low‑rate line is deliberately left alone with a note saying so; debt sitting between the two lines is called out as a preference rather than a calculation. Both thresholds are settings you can change.
- It tells you what it cannot see. Every answer ends with its blind spots — an employer 401(k) match (usually the best return available anywhere, and invisible to this app), your remaining contribution room and tax situation, insurance gaps and dependants, and the fact that the line between paying down debt and investing is a convention rather than arithmetic.
- Portfolio health gives your holdings a letter grade with the reasoning behind it — concentration in a single position, cash sitting idle, and similar.
- Rebalancing compares your actual mix against any allocation targets you’ve set and lists what to buy or sell to get back in line. It only speaks up once a target has drifted past a tolerance band, so normal day‑to‑day movement doesn’t generate busywork.
Listing comparisons — selected space companies
In Research, open the listing comparison, select peers and switch between the first year after listing and the latest 12 months. First-year lines start at the listing-day close; missing prices are labeled. IPO and SPAC listings are distinguished, and unfinished first years show progress so far. These selected histories do not establish the best time to buy across all IPOs.
Paper portfolio — try an idea
When enabled, create a paper portfolio with simulated starting cash. Record hypothetical deposits, withdrawals, buys, sells, fees and cash dividends; add a private rationale if useful. A Smart Money disclosure can be linked as context, but the app starts tracking from your saved paper activity, not the public figure’s earlier trade price. You can export your activity as CSV or delete a paper portfolio.
Paper cash and positions belong to your signed-in profile, including when a partner account can view shared finances. They do not change your real accounts, holdings, budgets or Watchlist. Quotes are dated and may be unavailable or stale. Performance comparisons use available history and label gaps; paper total return and a benchmark’s price return measure different things.
Paper options — practice a call or put
In a paper portfolio, choose Options in the trade ticket. Enter a stock symbol, call or put, strike, expiration, whole contract count and assumed premium per share. Each standard contract represents 100 shares. Review cost, maximum loss, break-even and payoff, then acknowledge the possible full loss before saving.
You can close contracts you hold or update their practice premium. Premiums stay at your saved assumption until updated. After expiration, explicitly record an outcome using an assumed stock price; the simulator records intrinsic value as a cash payout. It does not model live option quotes, exercise into shares, assignment or short-option strategies.
What Reaches You Without Opening the Page
- Alerts in your AI Inbox for things worth knowing: a large single‑day move in a position, a notable swing in your total portfolio, one holding growing into an outsized share of the whole, a watchlist target being crossed, upcoming earnings for something you own, and a brokerage that has stopped syncing.
- A weekly portfolio note on Saturday mornings — how last week went, which positions moved, and what the news said. It is written as a review rather than a call to action, and contains no recommendations.
- Ask the assistant directly, on the AI Inbox page or in Discord: “how’s my portfolio doing?”, “what’s the news on my stocks?”, or “I have $5,000 — where should it go?” It reads the same figures shown on this page.
If Prices Look Missing
Live prices, symbol search, and news all come from a market data provider that needs an API key set on the server. Your administrator configures this once (Admin → Deployment Guide, Environment Variables). Until it’s set, the page still works from your share counts and any values your brokerage reported or you entered by hand — prices simply won’t update on their own.
Trend & momentum in 6.0.0
Open a held or watched security, then expand Trend & momentum under Assessments & indicators to see dated RSI14, SMA50/200 and recent crosses. Changing the chart range keeps the same RSI history. Enable Show SMA50/SMA200 to overlay averages; Watchlist filters use only verified current readings. Expand the explanation for source, adjustment and calendar details.
What this tells you about the asset explains the readings in plain language: how far the price sits from each average, colour-coded pills (green uptrend, amber caution, red downtrend) for conditions such as broken support or an overextended move, and a golden/death cross guide covering what the cross means and how different investors usually react. An RSI bar shows where momentum sits between the oversold (below 30) and overbought (above 70) zones. The Holdings table shows the same trend pill under each symbol, plus flags for a recent cross, an RSI extreme or a stretched move. Above the table, the trend mix bar shows each trend’s share of your holdings value; select a trend pill to show only those holdings. These describe past prices, not a forecast.
RSI14 needs 15 closes; averages need 50/200 consecutive sessions. IPO, stale, missing and unverified states explain unavailable readings. Technical notifications default off: opt into Watchdog changes in each security detail. They respect snoozes and remain paused when history is not verified/current. Split-adjusted prices exclude dividends, and these readings describe past momentum.
Stock decision grade preview and source preparation
When an administrator enables the preview, eligible held/watched stocks show separate Long-term and Swing assessments with dated reasons, factor contributions and private saved history. Use explicit evidence preparation to load bounded SEC/Finnhub/Twelve Data sources; incomplete comparable cohorts, unsupported capital scope and missing reconciliations remain insufficient. Viewing an existing grade is cache-only.
Long-term/Swing grade-change preferences are separate and default off; eligible changes produce in-app updates. Collection and automatic source refresh also require separate administrator switches. Institutional and political disclosures remain dated supporting context with zero scoring weight. Predictive validation is pending.
Research and cash planning
Research opens with Overview, Research Agents and Saved Reports. Review Stock Diagnostics, choose among eight reports with explicit costs/confirmation, and keep the selected company's context when comparing peers. Purchase Preview shows hypothetical cash, reserves and concentration first; technicals and grades do not change those calculations. In Smart Money, the current evidence date remains separate from the original transaction/disclosure dates.
AI Assistant & Discord Pro
The AI Inbox (in the sidebar) is a helper that looks at your own data. It answers plain-English questions, runs a check every morning for things worth knowing about, and can offer to make two specific changes for you — but only ever behind a Confirm button. It never changes anything on its own.
Choose a chat mode
Use Simple chat for general questions and explanations. This mode does not load your financial records and has no tools to look them up or propose changes. Use Ask about my finances for questions about your transactions, budgets, properties and debts, or help that needs those records. Your administrator chooses the provider and model for each mode; users do not select a model in AI Review.
Choose between the two Chat mode cards: Ask about my finances and Simple chat. Each explains whether it uses your records; the selected card is marked with a check. The connection and model appear just below. Keyboard users can focus the choices and use arrow keys to switch. Switching modes starts a new conversation, and saved threads reopen in their original mode. Answers show the serving connection/model and identify an approved backup when one was used. A mode with no eligible model is unavailable until an administrator configures it.
Choose providers and models (administrators)
Open Admin → AI Settings. The page opens on Connections & models, with setup steps and summaries of ready features, active connections and estimated monthly spend. Use Add connection, enter a connection name, provider and API key, then click Save connection. Save a separate named connection for each Anthropic, OpenAI, OpenRouter or local/self-hosted endpoint. You can keep several providers, or multiple accounts with one provider, configured at the same time. Adding a key does not replace another connection or change which model serves a task. Saved keys are never displayed back to the browser.
- Select the saved connection and click Fetch models. New models appear disabled; existing selections and routes are preserved. Background catalog refresh updates stale catalogs when enabled on the server.
- Select a model, expand Advanced compatibility tests, and test the capabilities its tasks need. Compatibility tests use synthetic data and may incur provider charges. Check Enabled for routing and click Save model after checking it. Prices and token settings are under Pricing & technical limits; discovery alone does not prove it can handle tools, images or PDFs.
- Switch to AI preferences, choose a Default AI model, and optionally set a Monthly spending limit ($). Under How AI helps you, open a feature to choose its AI model and optional Backup model. For example, assign Simple chat to a local model, Detailed reports to a flagship cloud model, and Receipt photos/PDFs to models that passed those document tests.
- For tasks that must stay on private infrastructure, mark the connection as local/private and check Keep data on a local / private connection on the feature. Both primary and backup must meet that boundary. Expand Advanced limits for token, round, timeout and per-feature spending controls. Click Save preferences to apply your changes; switching sections preserves unsaved preferences.
Expandable settings use section headers with descriptions and a plus/minus indicator; dropdown fields keep a downward arrow. Use Show or Hide to expand or collapse an advanced section (on narrow screens, the plus/minus icon remains visible). Connection key removal, environment-key fallback and the optional Anthropic billing admin key are under Advanced connection settings. Open Usage & spending for monthly attempts, known estimated cost, attempts with unknown cost and the connection/model/outcome breakdown. These are administrator settings for everyone using the app, not personal model preferences.
Simple chat needs text support; finance chat also needs tool support. Detailed reports use the existing Investments → Research workflow. Receipt photos and PDFs are separate task routes. Historical batch backfill and live source search currently require an Anthropic connection.
Backups and AI spending limits
A temporary provider outage or rate limit can use only the backup the administrator assigned. Authentication, payment, incompatible output and context errors do not switch providers. Once an application tool has run, fallback stops so a proposal is not replayed. Confirming financial changes remains a separate user action.
Administrators can bound request size, output, rounds and time, and set estimated request/monthly spending limits. Cloud models need known pricing for dollar limits; usage estimates are not provider invoices. Image/PDF requests with hard dollar caps are currently blocked because reliable input-token counting is not implemented. This includes a global monthly dollar cap. Leave the applicable dollar caps blank to permit document extraction under its file-size, output and timeout limits.
Ask a Question
On the AI Inbox page, type a question the way you’d ask a person — for example, “How much did I spend on groceries last month?” or “Is all my rent paid?” — and choose Ask about my finances and it answers using your own transactions, budgets, properties, and debts. Under each answer it shows what it checked, so you can trust where the number came from.
The Morning Run
Every morning the app does a short round of housekeeping in order, so that by the time you look at anything the numbers are current:
- Syncs your accounts, so the day starts on fresh data.
- Links transfers between your own accounts. Moving money from checking to savings arrives from the bank as two unrelated rows, which would otherwise count as both spending and income. Linked pairs are excluded from both.
- Applies your rules, then asks the AI to categorize whatever is left. If your rules cleared everything, this step is skipped and costs nothing.
- Runs the check-in over the last 30 days: unpaid rent, a budget nearly or fully spent, a bill higher than usual, a possible duplicate charge, a lease ending soon.
- Posts a worklist of what actually needs a decision from you.
The check-in only speaks when there is something to say. A reminder you have already been shown is not repeated the next morning just because the situation is still true — it comes back only if it actually gets worse. A budget creeping from 92% to 94% is not worse; crossing its limit is. Unpaid rent growing by another month’s charge is. When a reminder does return for that reason, it is marked Got worse so you can tell it apart from something you are seeing for the first time.
Two buttons decide what happens next to a reminder:
- Snooze hides it for a week, whatever happens. Use it for something you intend to come back to.
- I know never expires. Use it when you have seen the reminder and accepted the situation — a bill that is higher because you know why. It stays quiet until the situation genuinely deteriorates, and it is also what removes the item from your weekly summary.
Anything urgent is never hidden completely. Once you have been told about it, it shrinks to a single line in a collapsed Still open list at the bottom of the check-in, with a count of how many days it has been outstanding. Unpaid rent stops shouting at you every morning, but it does not quietly disappear either.
The Weekly Summary
Because the daily check-in stays silent on days when nothing changed, once a week you get a short roundup of everything still outstanding. It is labelled Weekly roundup and raises nothing new — it exists so that a long quiet stretch reads as “still nothing new” rather than as the app having stopped working. Anything you marked I know is left out of it.
The worklist is deliberately quiet: if nothing needs a decision and nothing was changed for you, no message is sent at all. A daily note that usually says “nothing to do” is one you stop opening.
Transfers Linked For You
Transfers between your own accounts are the one thing the morning run changes without asking, because it is easy to check and easy to undo. Every link is listed individually in the morning message — not summarized as a count — so you can see exactly what was paired. If one is wrong, open either transaction and choose Not a transfer: it unlinks both rows without deleting anything or touching your balances, and that pair is never re-linked.
It is deliberately hard to satisfy. Two transactions are only linked if they match to the cent, are within four days of each other, sit on two different accounts of yours, and at least one of them actually says “transfer”. If two transactions of the same amount could each be the other half, it links neither and tells you to pair them yourself.
Asking It to Change Something
You can ask the assistant to fix a category or resize a budget, and instead of telling you where to click it puts a Confirm button in the chat. For example: “that Home Depot charge should be Repairs, not Shopping” or “set my Groceries budget to $675”.
Nothing happens until you tap Confirm. Tap Discard and the proposal is thrown away. A few things worth knowing:
- Only two things can be proposed: recategorizing one transaction and changing one category’s monthly budget. Leases, co-owners, properties, payments and accounts can only be explained, never changed.
- The wording on the card is written by the app from your real data, not by the AI — so what you approve is exactly what happens.
- It is checked twice: once when proposed, and again when you confirm. If your data moved in between — the transaction was split, the budget became a one-month override — it fails with an explanation instead of writing something wrong.
- If two identical charges on the same day both match, it asks which one you mean rather than guessing.
- Proposals expire after a day. Ask again and it will be re-checked against current data.
Questions It Can Now Answer
Beyond “how much did I spend on X”, a few kinds of question have their own built-in maths, so the answers come from the same calculations the app’s own pages use:
- “What if I paid an extra $200 a month?” — tests a change to your debt payoff plan against your real balances and rates, and tells you how many months and how much interest it saves. It can also compare avalanche against snowball, or test a lump sum from a refund or bonus. Nothing about your plan is changed.
- “Are my budgets realistic?” or “Where can I cut?” — looks across six months rather than one. See The Budget Review below.
- “My paycheck just landed — what’s already spoken for?” — lists the bills due before your next paycheck, your debt minimums, this paycheck’s share of any Planned Expenses, and what is left over. If the paycheck doesn’t stretch, it says by how much and what would go unfunded rather than quietly making the numbers fit. It is a plan only — nothing is recorded or moved.
The Budget Review
In the first few days of each month you get a Budget review: a look across the last six months rather than at one, answering a different question from the usual budget warning. Not “am I over this month?” but “are these budgets even set right?”
- Budgets you miss every month aren’t targets, they’re wrong numbers — it tells you what the budget would have to be to match how you actually spend.
- Budgets you barely touch are money parked for nothing. Most people never notice these.
- Spending that swings — well over some months, far under others — gets the honest answer: a monthly line is the wrong shape for it, and it may belong in Planned Expenses instead.
- Subscriptions that went up in price, with what the increase costs you per year, and subscriptions you haven’t been charged for in 90 days — either cancelled and forgotten, or about to surprise you.
You can also ask for this at any time in the AI Inbox instead of waiting for the monthly one.
The AI Review Queue
When you click Categorize new transactions (or the morning run does it for you), each proposed category waits in Transactions → AI Review until you decide. The queue only holds decisions that are still open:
- It cleans up after you. If you categorize a transaction some other way — by editing it, with a rule, with a bulk edit, or by splitting it — its suggestion drops out of the queue on its own. You never have to reject something you’ve already dealt with. The one exception is a suggestion that also names a rental property the transaction isn’t filed to yet: that part is still your call, so it stays.
- Repeats are grouped. Twelve Amazon charges all headed for Shopping show as one row marked ×12 with their total. Accept 12 or Dismiss 12 handles them together; the arrow opens the group if you want to go through them one by one.
For a long queue, two buttons sit above the list:
- Accept all at 90%+ accepts every suggestion at or above the confidence you pick (95%, 90% or 80%). Like Auto-apply, it never touches suggestions that file a charge to a rental property or a Schedule E line — those have tax consequences, so they wait for you to look at each one.
- Dismiss all clears the queue without changing any transaction. It asks first, because the AI won’t suggest a category for those transactions again. Dismissing isn’t treated as telling the AI it was wrong, so it doesn’t affect the rules it suggests later — only Reject on a single row does that.
Month-End Close
On the 1st of each month the app closes out the month that just ended and posts a month in review: what you budgeted against what you spent, which categories went over, and a checklist of anything still open — accounts that stopped syncing before month-end, transactions with no category, decisions still waiting in the AI review panel, and rent that hasn’t been reconciled.
Each open item says what to do about it. Going over budget is reported but never counts as unfinished — that’s information about a month that’s already over, not a task.
Scanning Receipts
You can hand the app a pile of receipts and have it read them for you — one at a time, or a whole folder at once. It fills in the vendor, total, and date, and looks for the matching charge in your ledger. Nothing is attached until you say so.
- Go to Transactions and open the AI Review panel.
- Click Scan receipts.
- Pick your files. To select several at once, drag a box around them, or hold Ctrl (Cmd on a Mac) and click each one. Photos and PDFs both work, up to 5 MB each.
- Wait while it reads them. A list shows the progress of each file, a few at a time. If one can’t be read, the rest still go through — that file stays in the list with the reason.
- Review each reading in the panel. Where the app found exactly one charge matching the total and date, it pre-selects it; otherwise pick the right transaction from the dropdown.
- Click Attach to save the receipt to that transaction, or Discard to throw the reading away.
- If the receipt is itemized and the items fall into more than one category, a second button appears: Attach & split. See below.
Splitting an Itemized Receipt
A single Target run is often half groceries and half household supplies, but arrives as one charge against one budget. When a receipt lists its items, the app reads them, works out which category each belongs to, and offers to split the charge across the matching budgets with one tap. The item names are shown under each part so you can check it before confirming.
- Tax and tip follow what was bought. They’re spread across the categories in proportion to spend rather than dumped into one, so each budget is charged what that purchase actually cost.
- A store-wide coupon is spread the same way, with the opposite sign. A discount that names a category comes off that category alone.
- The parts always add up to the charge — exactly, to the cent.
- Splitting is never assumed. Attach and Attach & split are separate buttons, and a receipt that only shows a total (a card slip, a parking stub) simply doesn’t offer the second one.
The app also checks the receipt’s own arithmetic before showing it to you. If the subtotal plus tax doesn’t equal the total, or the items don’t add up to the subtotal, it re-reads the receipt once before putting it in your queue — and if it still doesn’t add up, the reading is marked low-confidence rather than presented as clean.
A few things worth knowing:
- If a receipt doesn’t match anything yet — a card charge often posts a few days after the receipt is printed — use Add as transaction to make one from what was read.
- Readings you haven’t decided on wait in the panel for 30 days, then clear themselves. You can hold up to 50 at a time, so review them as you go rather than letting them pile up.
- Anything the app can’t read as a receipt is discarded along with the uploaded file, so a bad photo leaves nothing behind.
Connecting Discord (Optional)
If your household uses the app’s Discord bot, you can connect your account to it and get the same answers and daily check-ins as a chat message on your phone. This step is entirely optional — everything above already works without it.
- In the app, go to Settings → Notifications.
- Under Receipt bot, click Generate link code. A short code appears — copy it.
- Open Discord and find the Financial Companion bot. (If you’re not sure where it is, ask whoever set the app up for your household — the bot has to be turned on for your installation first.)
- Send the bot a direct message: type
/link, paste your code where it asks, and send it. - The bot replies to confirm you’re connected. That’s it.
What You Can Do Once You’re Connected
- Ask anything, just by typing it — the same as the AI Inbox page, right in the chat.
- Photograph a receipt and send it as an attachment. The bot reads it and offers a button to save it — nothing is added to your ledger until you tap.
/spend todayand/rent statusfor a quick answer without typing a full question./digest nowto run the daily check-in on the spot instead of waiting for tomorrow./feedbackto report a bug or an idea, with an optional screenshot. It lands in the same place as the in-app feedback button.- If you’re connected, the daily check-in also arrives as a message from the bot, with a Snooze button on anything you’d rather not see again this week. Only what is new or has changed is listed there; anything already reported and still open is counted at the end of the summary rather than repeated.
Nothing Changes Without You Tapping
The assistant cannot change anything by itself. It can propose exactly two things — recategorizing one transaction, and changing one category’s monthly budget — and each one waits behind a Confirm button until you tap it. A receipt you photograph is the same: it is only saved once you tap. Everything else it does is read-only.
The one exception is linking transfers between your own accounts during the morning run, which is listed for you in full and undone in one click with Not a transfer.
Only your own connected Discord account can see your data; no one else’s messages can. You can disconnect at any time from Settings → Notifications.
Only the account owner can link Discord. The link is removed automatically when you change your password, email or two-factor setting, or change or remove a partner, so an old link can’t keep reading your finances. If the bot stops answering after one of those, generate a new code and send /link again.
Receipt Mailbox Pro
Forward a receipt email to your receipts address and the app reads it for you. No photo, no upload. Readings land in the same AI Review panel as scanned receipts, and nothing touches your ledger until you accept it.
Set It Up
- Go to Settings → Connections and scroll to Receipt mailbox.
- Enter your mail server, port, and username. Ask whoever set up the app if you don’t know these.
- Pick your Sign-in method. Most mailboxes use Password. For Gmail, Outlook.com and other providers with two-step sign-in, enter an app password, not your normal one.
- Microsoft only appears if the administrator has set up a Microsoft 365 mailbox for your account. Choose it for that mailbox. There’s no password field, and that is expected.
- Click Save, then Test connection. It confirms the folder and how many messages are in it.
Use It
- Forward a receipt email to your receipts address.
- Wait for the next check (every 15 minutes), or click Check now.
- Open Transactions → AI Review and accept or discard the reading.
Approving Senders
Your receipts address is not a secret — you hand it to vendors. So the sender is what the app trusts, not the address.
- The first email from a new sender is held, not read. It appears in Settings with the sender’s address.
- Click Approve if you trust them, or Block if you don’t.
- Approving immediately reads the email that was being held — you do not need it sent again.
- Everything from that sender goes straight through from then on.
Your own email address is approved automatically, so forwarding from yourself works right away.
Keeping the Mailbox Tidy
In Settings → Connections → Receipt mailbox, set After a message is processed:
- Leave it where it is — the default. Nothing is touched.
- Mark it as read — the message stays but stops being unread.
- Move it to another folder — keeps the inbox clean and the originals available. Recommended.
- Delete it — sends it to Trash.
Only finished mail is touched. Anything waiting for your sender approval stays put, so you can still approve it later.
Every Receipt Keeps a Copy
If the email has a receipt attached, that file is saved and attached to the transaction. If the receipt is in the message body instead — as Amazon, Uber, and Apple send them — the app saves a picture of the email itself. Either way you get a receipt you can open later.
It Says “No New Mail”
- Check the Activity list in Settings — it says what happened to each message.
- If the message is listed as Held, approve the sender.
- Mail that arrived more than a day before you connected the mailbox is skipped on purpose, so old inboxes aren’t swallowed whole. Forward it again if you need it.
What Protects You
- Unknown senders are held, so someone who learns your receipts address still cannot put anything in your ledger.
- Forged mail is held even from an approved sender, using the checks your mail provider already performed.
- Receipt emails are opened in a locked-down viewer that cannot run code or load anything from the internet, so tracking pixels never fire.
- Nothing is added to your ledger without you accepting it.
Settings & MFA
Configure app themes, visual preferences, and secure your account with Multi-Factor Authentication.
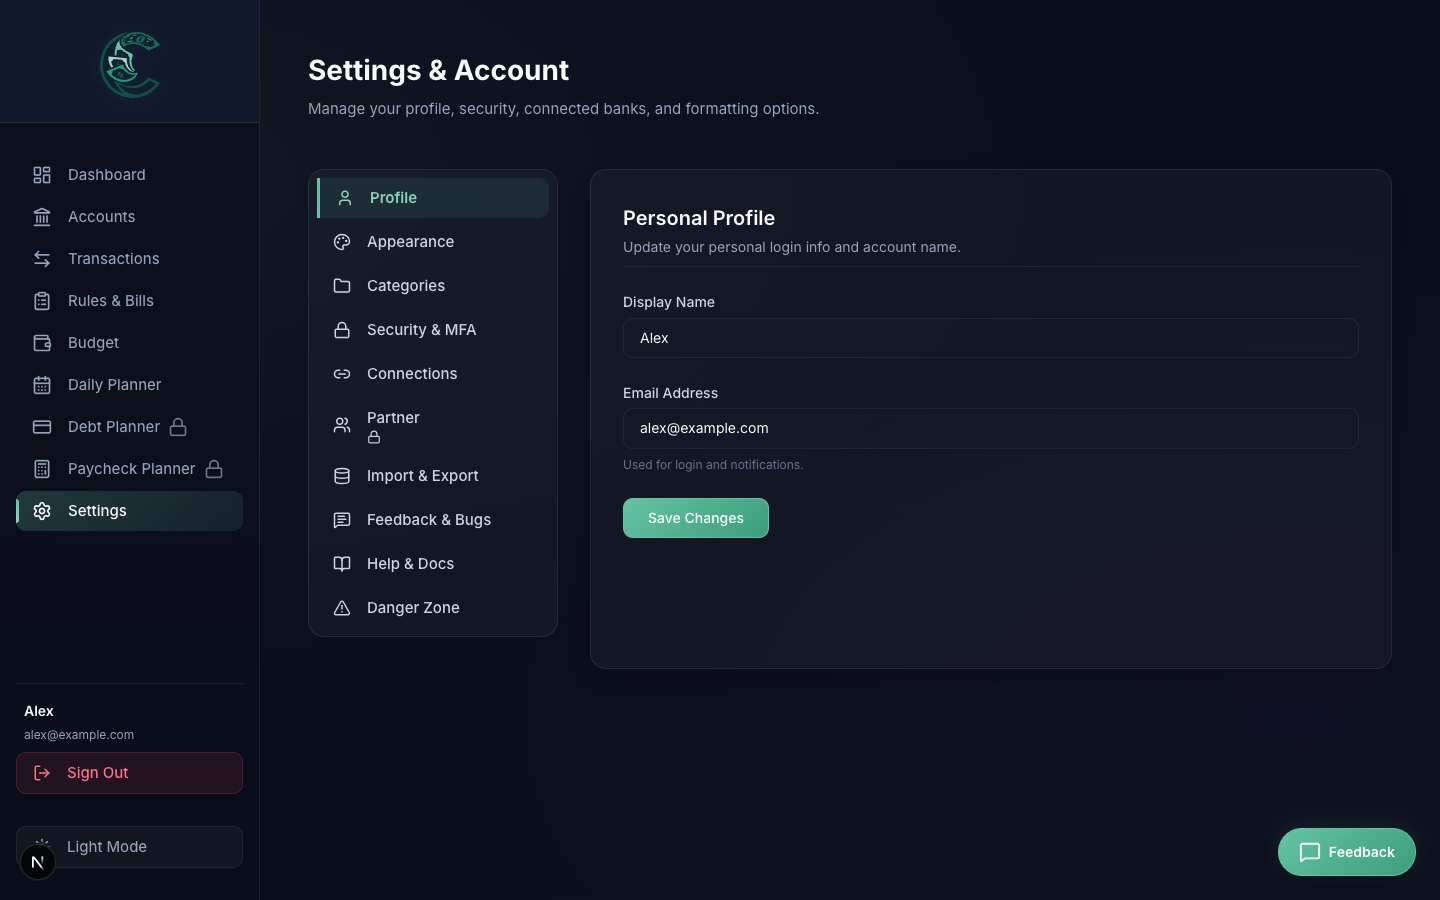
MFA Configuration
- In the Settings tab, click "Setup Multi-Factor Authentication".
- Scan the generated QR code using an authenticator app (Google Authenticator, Duo, Authy, etc.).
- Enter the current 6-digit verification code to pair the app and click "Verify & Enable".
- Upon next sign-in, the authenticator app code will be required alongside your credentials.
Budget Alerts & Weekly Spending Report
- Budget alerts: you’re told when a budget crosses 50%, 75% and 100% of its monthly limit, and warned once it goes over. Each level is announced once per budget per month; if spending drops back, the next crossing is announced again.
- Pace alerts: from the 5th, you’re warned when a budget is on pace to finish the month at least 10% over. The forecast follows how that category’s month usually unfolds over the last six months, so rent paid on the 1st doesn’t look like a runaway month. It waits until a quarter of the budget is spent, and repeats only if the forecast drops back under the limit and then climbs again. Pace warnings have their own email switch in Settings → Notifications and their own Discord channel setting; until you change them, they follow your budget alert choices.
- Automatic budget changes: a note when a budget you set to update automatically changes for next month (see Budgets & Rollovers).
- Weekly spending report: every Monday you get a donut chart of this month’s spending by category plus the last 7 days’ total.
- Saved report emails: the summaries and spending-limit alerts you set up on a saved search in Reports (see Reports & Spending Search).
- Turning them off: everyone (owner and partners) has their own email switches in Settings → Notifications. The household’s Discord gets one copy, in whichever channel that notification is routed to (see below). A saved report’s Discord posts are switched on per report.
Discord Channels for Notifications
Notifications can go to different Discord channels. For example, the daily digest can go to one channel and spending alerts to another, so neither gets buried. A Discord webhook always posts to the one channel it was made in, so you add one webhook per channel and choose which notifications each one gets.
- In Discord, open the channel’s settings: Edit Channel → Integrations → Webhooks → New Webhook, then Copy Webhook URL.
- In Settings → Notifications → Discord, give it a name (such as Spending alerts), paste the URL and click Add. Repeat for each channel, up to five. The first webhook becomes the default. Test posts a message to that webhook’s channel.
- Under Where each notification goes, pick a channel for each notification, or Off: the daily digest, the morning worklist, the month-end review, budget alerts (with automatic budget changes), budget pace warnings (which follow budget alerts until you route them), the weekly spending report, saved report summaries and limit alerts, and new charges from saved reports. Default follows whichever webhook is marked default, so anything new also lands there.
- Removing a webhook sends what it carried to the default webhook rather than switching it off. A notification you set to Off stays off. The pencil button renames a webhook; a webhook you had before this feature is called Main channel until you rename it.
- One saved report, its own channel: in Reports, a saved report’s Emails & alerts window can send that report’s Discord posts to a specific webhook, for example a #coffee channel just for Starbucks.
- Digest DMs from the Discord bot are separate from these channels. Turn them on or off under Receipt bot once your account is linked.
- Webhook URLs are stored encrypted and only ever shown shortened. Anyone holding a full webhook URL can post into that channel, so treat it like a password.
- Webhooks a partner adds are labelled Added by with their name, and they’re removed automatically when that partner leaves, is removed or deletes their account, so a channel they chose stops receiving your household’s notifications. Webhooks added before this was recorded carry no label; if a partner has left, check the list once.
Import, Export & Bank Connections
Manage your external bank feeds and backup your local application data under the Import & Export tab in Settings.
- SimpleFIN Connections: Securely connect read-only bank feeds by pasting your SimpleFIN Setup Token.
- Syncing and Status: Sync transactions manually in settings, and view connection health alerts (
payment_requiredorrevoked). A sync never undoes your own edits: category, tags, notes and a manual “mark as refund” are kept. - Disconnecting a bank: the link is removed (and revoked at Plaid), but its accounts and transactions stay, as manual accounts, along with their splits and co-owner shares. To delete them as well, tick the delete checkbox in the confirmation. That can’t be undone.
- CSV import duplicates: a row is skipped only if that many identical rows (same date, description and amount) already exist, so two real $4.50 coffees on the same day both import.
- Backup & Restore: Full SQLite database import/export controls.
Admin Admin Dashboard
Administrators have access to system diagnostics, user management settings, feedback reviews, and security logs.
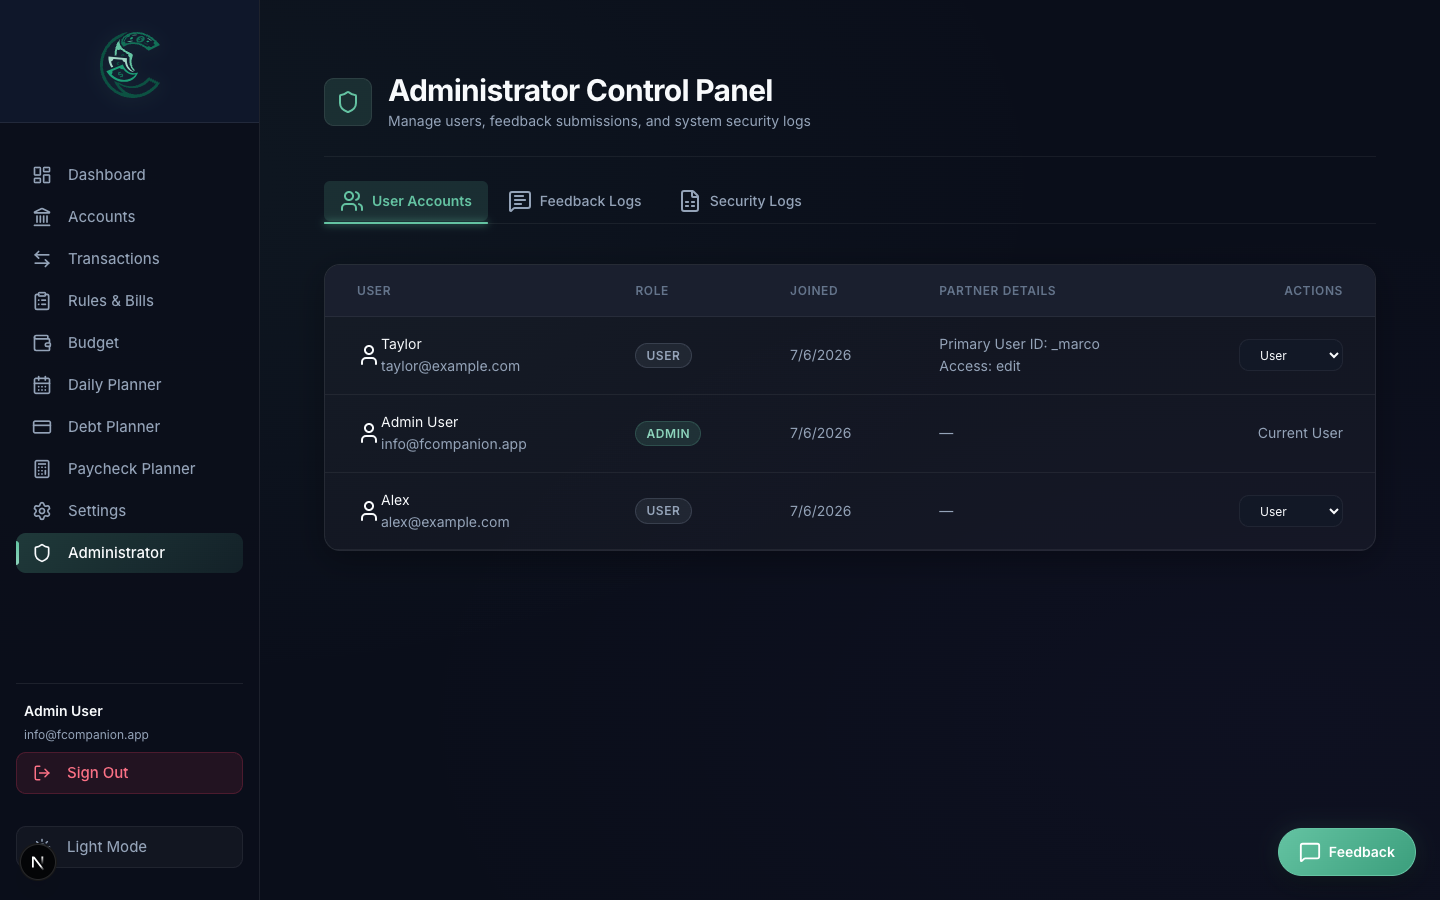
Audit Capabilities
- User Management: Change roles (USER, ADMIN) and review accounts status.
- Invite a user: Registration is closed to the public, so this is how someone gets an account of their own. Enter their email, pick Free or Pro, and click Send invite. They get a link that’s good for 7 days and must register with that email address. Pending invites are listed underneath; click × to revoke one. To add someone to your own household instead, send a partner invite from Settings.
- Delete an account: Click the trash icon on a user’s row. Type their email address and your own password (and authentication code, if you use two-factor sign-in) to confirm. Everything in the account is deleted for good. Its partners become ordinary Free accounts. You can’t delete yourself here, or another admin until you change their role. Use Last Login to spot accounts nobody uses.
- Feedback logs: Check user-submitted feedback, read admin notes, and toggle resolved status.
- Security Audits: Filter logs by security events (e.g. login failures, registration, role changes, credentials reset) with user detail and IP tracking.